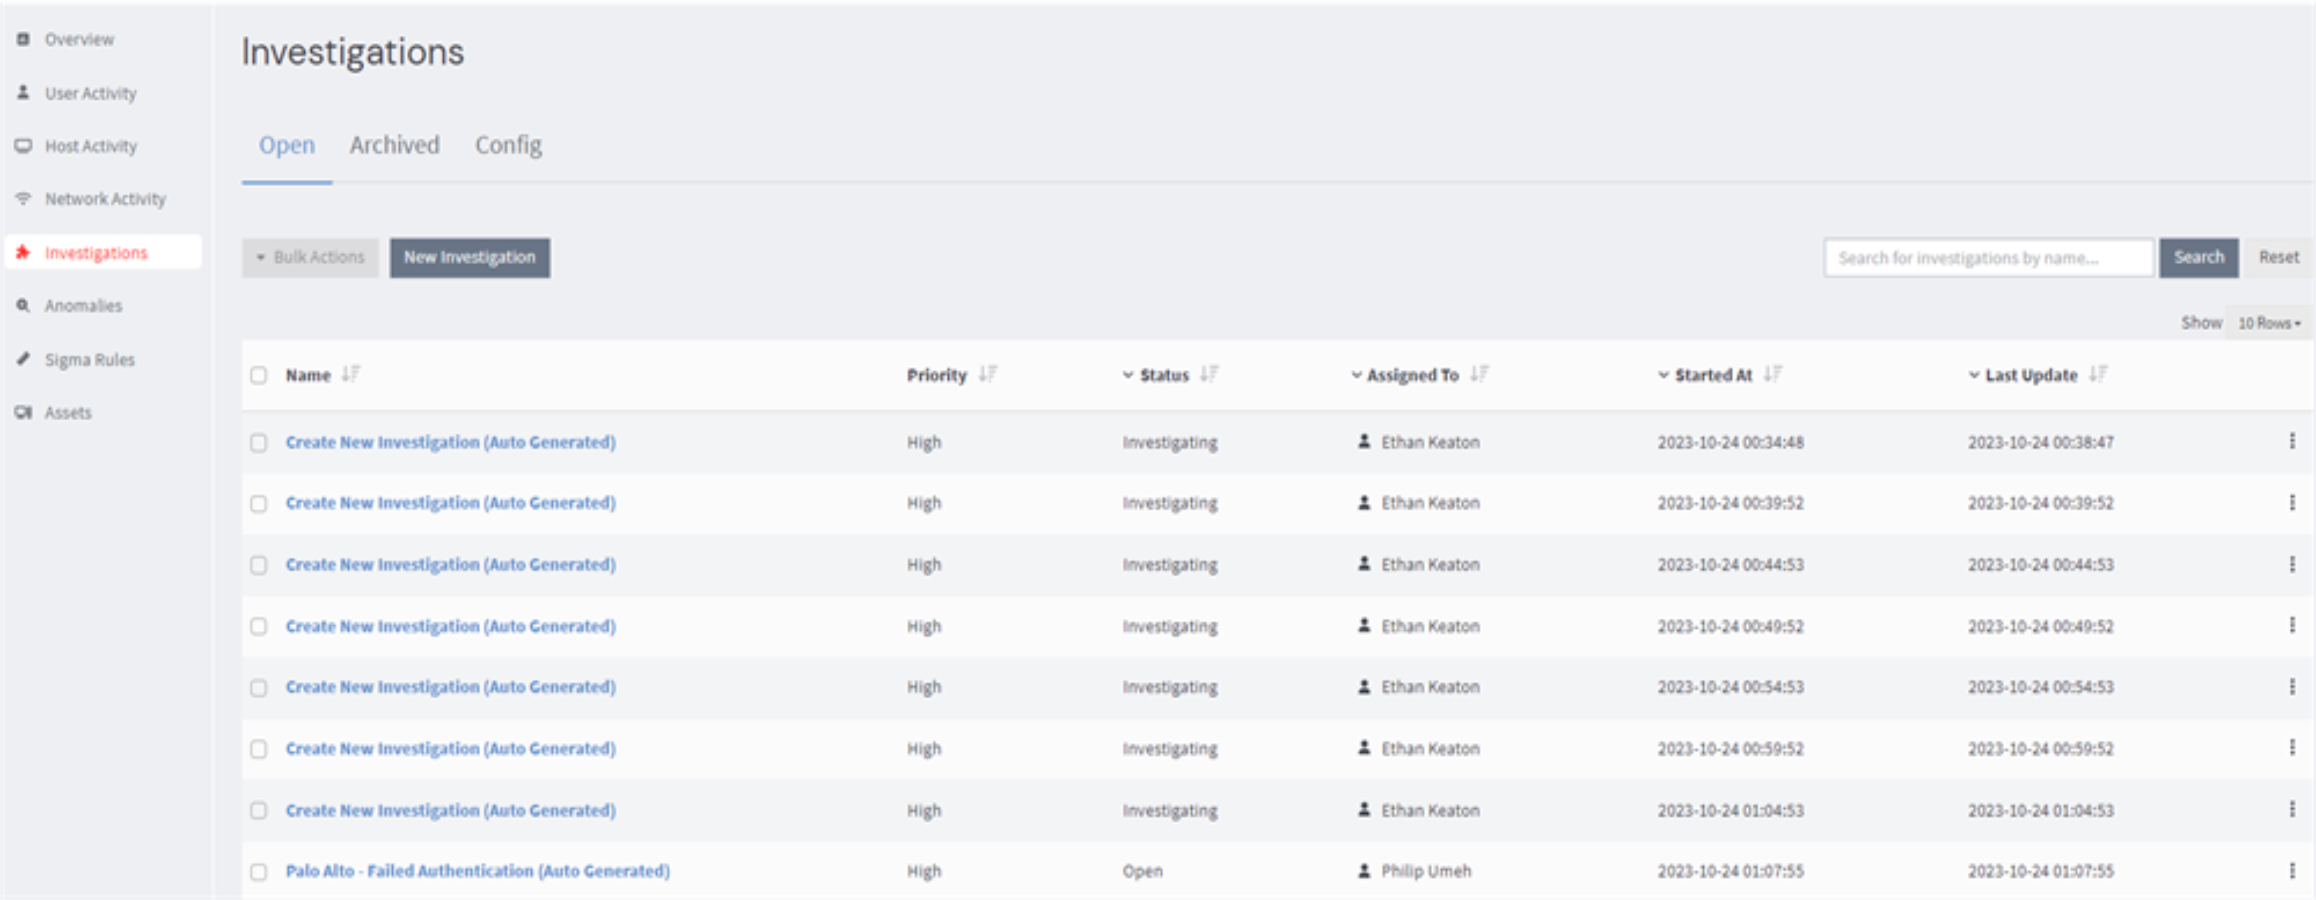
You can associate an alert attached to an event definition with Graylog's Investigations module, allowing new investigations to be created based off of alerts or evidence to be added to existing investigations when an alert is fired. This workflow is configured through the Event Definitions menu. For more information on events and defining event definitions, see the documentation on events and event definitions.
Create a New Investigation from Alert Notification
To generate a new investigation whenever an event is triggered, it is necessary to create an event definition. An event definition consists of conditions that, once met, fire an alert. Users can then be notified of this alert via various notification types supported by Graylog, such as Slack, MS Teams, Email, and other provided alert options.
-
Navigate to the Alerts tab in Graylog.
-
Click on the Event Definitions sub-menu tab.
-
At the right hand corner of the resulting page, click on the Create event definition button.
-
You may now create the new event definition as needed.
-
In the Notifications dialogue, click on the Add Notification button and select Create New Notification from the resulting drop-down options. For further details on Graylog notifications, see the corresponding documentation.
-
Provide a title and a description for the notification and select the Create Investigation Notification option from the Notification Type drop-down options.
-
Click on the check box option to "Create a New Investigation for Every Alert."
-
Upon clicking the check box, a message prompt appears. Read the prompt and confirm to proceed.
Warning:Generating an investigation for each triggered alert can easily lead to an overwhelming list of investigations. Please proceed with caution.To manage automatically generated investigations, you can specify the search and execution run times in the event conditions dialogue. For instance, you can specify time intervals, such as every 30 minutes or every 1 hour, for the "Search within the last" and "Execute search every" fields. This will limit the number of investigations created automatically whenever the alert is triggered. You also have the flexibility to customize the event limit based on your preferences.Additionally, you have the option to disable the automatic execution of event definitions and manually enable them when necessary from the Events Definitionspage.
-
Complete the process with the following fields:
-
Assign Investigation To: The assignee for any new investigation.
-
Investigation Priority: The priority for the new investigation (Critical, High, Medium, or Low).
-
Investigation Status: Assign a status to the new investigation by selecting from the available options in the drop-down menu.
-
-
You can test the notification by clicking on the Execute Test Notification button and selectDone or Next to proceed to the summary dialogue.
-
The Summary dialogue provides a summary of all imputed configurations. Click on the Create event definition button at the bottom right of the page, which concludes the process flow for creating a new investigation for every alert triggered by this event definition.
Now for every time the condition set for the event definition is met, an alert is triggered, and this will automatically create a new investigation.
The event definition you have created is now also enabled and can be further managed from the Event Definitions page just as any investigation generated from the alert is added to your list of investigations.

Add Every Alert to an Existing Investigation
You can additionally configure Graylog to add an event as evidence to an existing investigation whenever an alert for that event is triggered. This way, you can seamlessly integrate events into your ongoing investigations without creating separate investigations for each alert.
-
Navigate to the Alerts tab in Graylog.
-
Click on the Event Definitions sub-menu tab.
-
At the right hand corner of the resulting page, click on the Create event definition button.
-
You may now create the new event definition as needed.
-
In the Notifications dialogue, click on the Add Notification button and select Create New Notification from the resulting drop-down options. For further details on Graylog notifications, see the corresponding documentation.
- Do NOT select the Create a New Investigation for Every Alert check box.
-
Provide a title and a description for the notification and select the Create Investigation Notification option from the Notification Type drop-down options. The following investigation configuration options will appear.
-
Investigation: Choose the investigation to which you would like to add the evidence.
-
Assign Investigation To: The assignee for any new investigation.
-
Investigation Priority: The priority for the new investigation (Critical, High, Medium, or Low).
-
Investigation Status: Assign a status to the new investigation by selecting from the available options in the drop-down menu.
-
-
You can test the notification by clicking on the Execute Test Notification button and select Done or Next to proceed to the summary dialogue.
-
The Summary dialogue provides a summary of all imputed configurations. Click on the Create event definition button at the bottom right of the page, and this concludes the process flow for adding an event as evidence to an existing investigation.

