Sigma rules can be imported and executed within the Graylog event processor. Sigma is a generic and open signature format that allows for the detection of suspicious or malicious activity. By importing Sigma rules into Graylog, you can leverage these rules to detect potential threats within your environment.
Sigma rules are YAML text signatures that enable you to identify suspicious events in your environment by matching log events that might indicate adversarial behavior or cyber threats. These rules are essentially a collection of “search scripts” used to identify specific threats within your IT environment.
The Sigma rule format is gaining popularity within the SIEM community and is quickly becoming a common standard for rule interchange. Graylog's Sigma rule processor allows you to connect and import rules from public Git repositories, including the SigmaHQ GitHub repository, providing access to over 2100 supported rules. These rules range from simple and specific to more complex and generic, enabling you to detect suspicious or unusual activity within your Graylog setup by matching Graylog messages against various Sigma rules.
With Graylog and Sigma rules, you can:
-
Import rules directly from the SigmaHQ repository which is publicly accessible on GitHub.
-
Import rules from any public Git repo.
-
Manually add your own rules via a YAML text editor.
-
Download Sigma rule files individually or in bulk.
-
Upload Sigma rules directly from the file system.
-
Clone an existing rule.
-
Associate a rule with 1 to N streams in Graylog.
-
Define how often and over what time window the rule should run.
How It Works
Sigma rules can be added manually or imported from the SigmaHQ GitHub repo or a public Git repo.
They can generate resource-intensive queries that could potentially stress or crash the search backend. Some rules use wildcard queries, which are not moderated or flagged as they are elsewhere in Graylog. In order to test the performance of individual rules, we recommend you use the Search Logs option before activating the sigma rule.
Import Sigma Rules from SigmaHQ's Repo
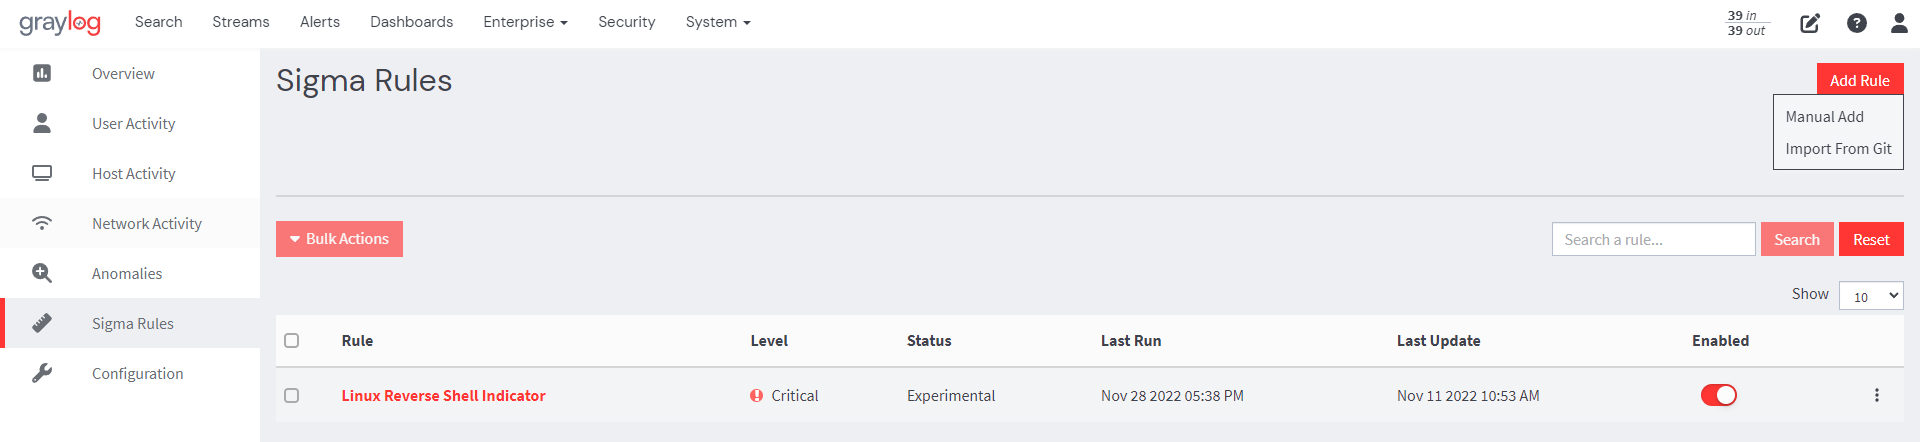
1. From your Graylog interface, navigate to the Security tab and select Sigma Rules from the left-pane menu.
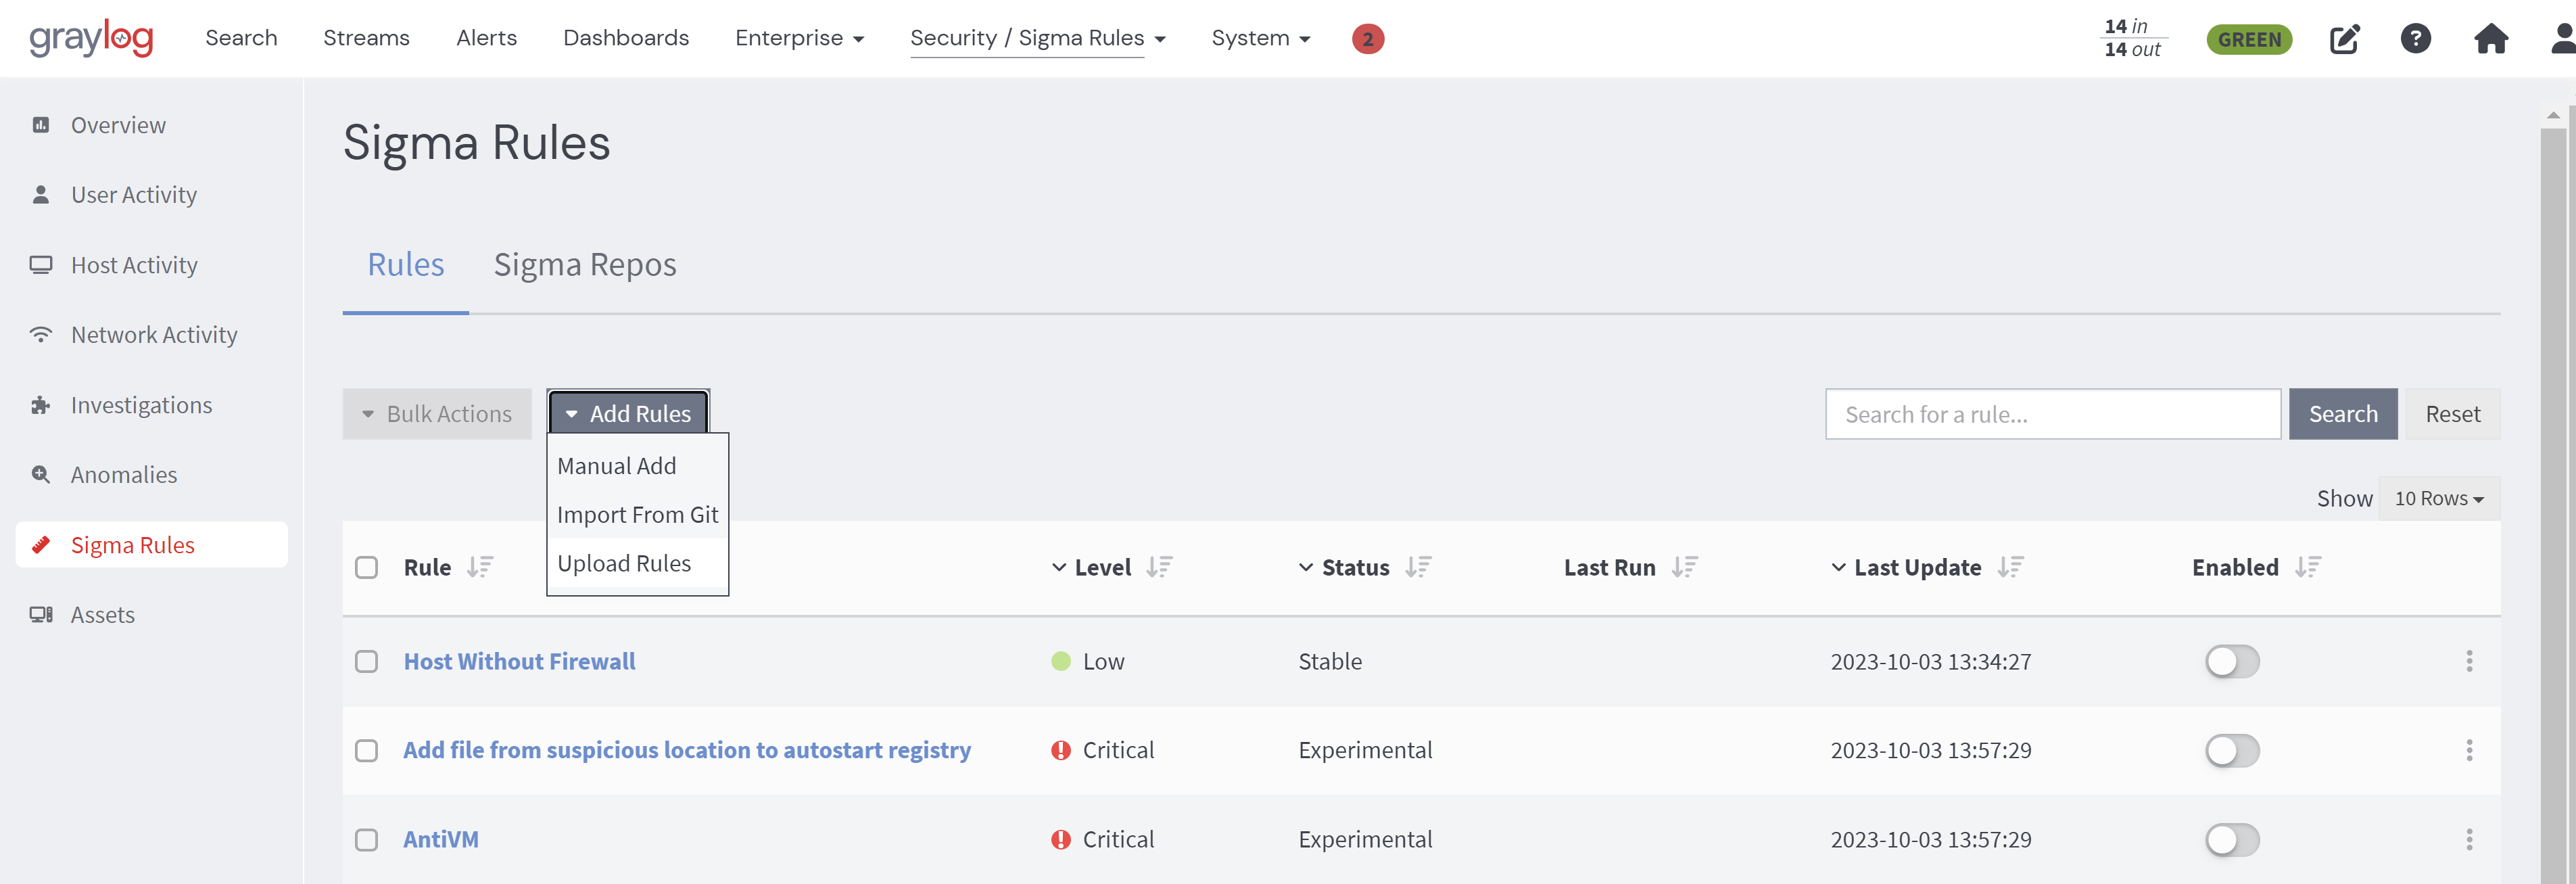
2. On the resulting page click on the Add Rule button and select Import From Git.
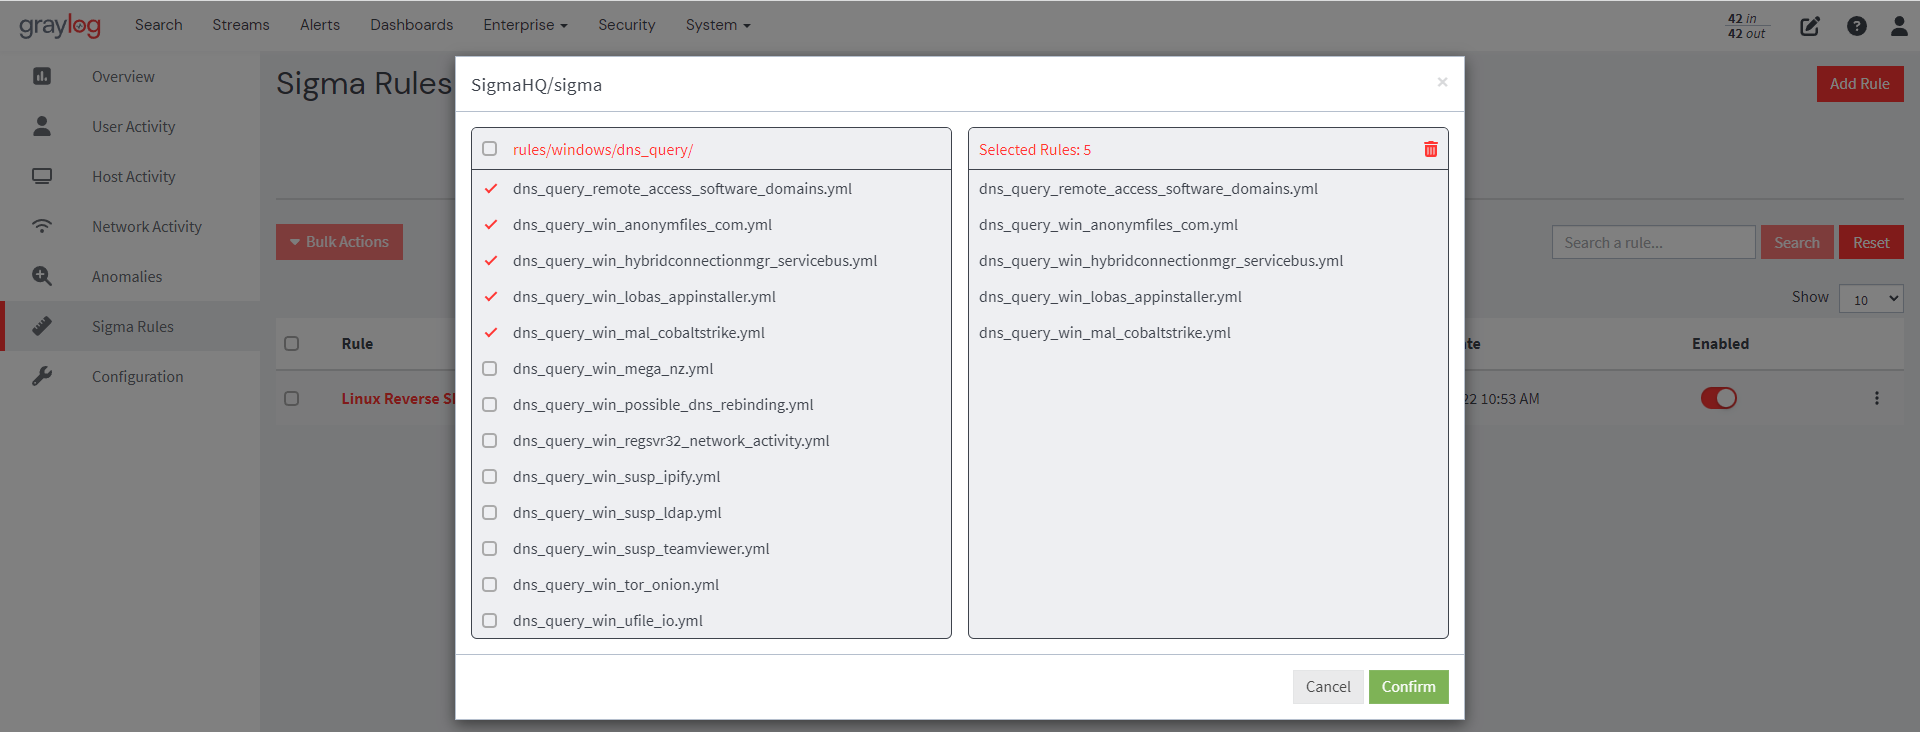
3. Select the sigma rule(s) you want to use from the SigmaHQ repository. Then, confirm your selections, and the selected rules will be imported into Graylog.
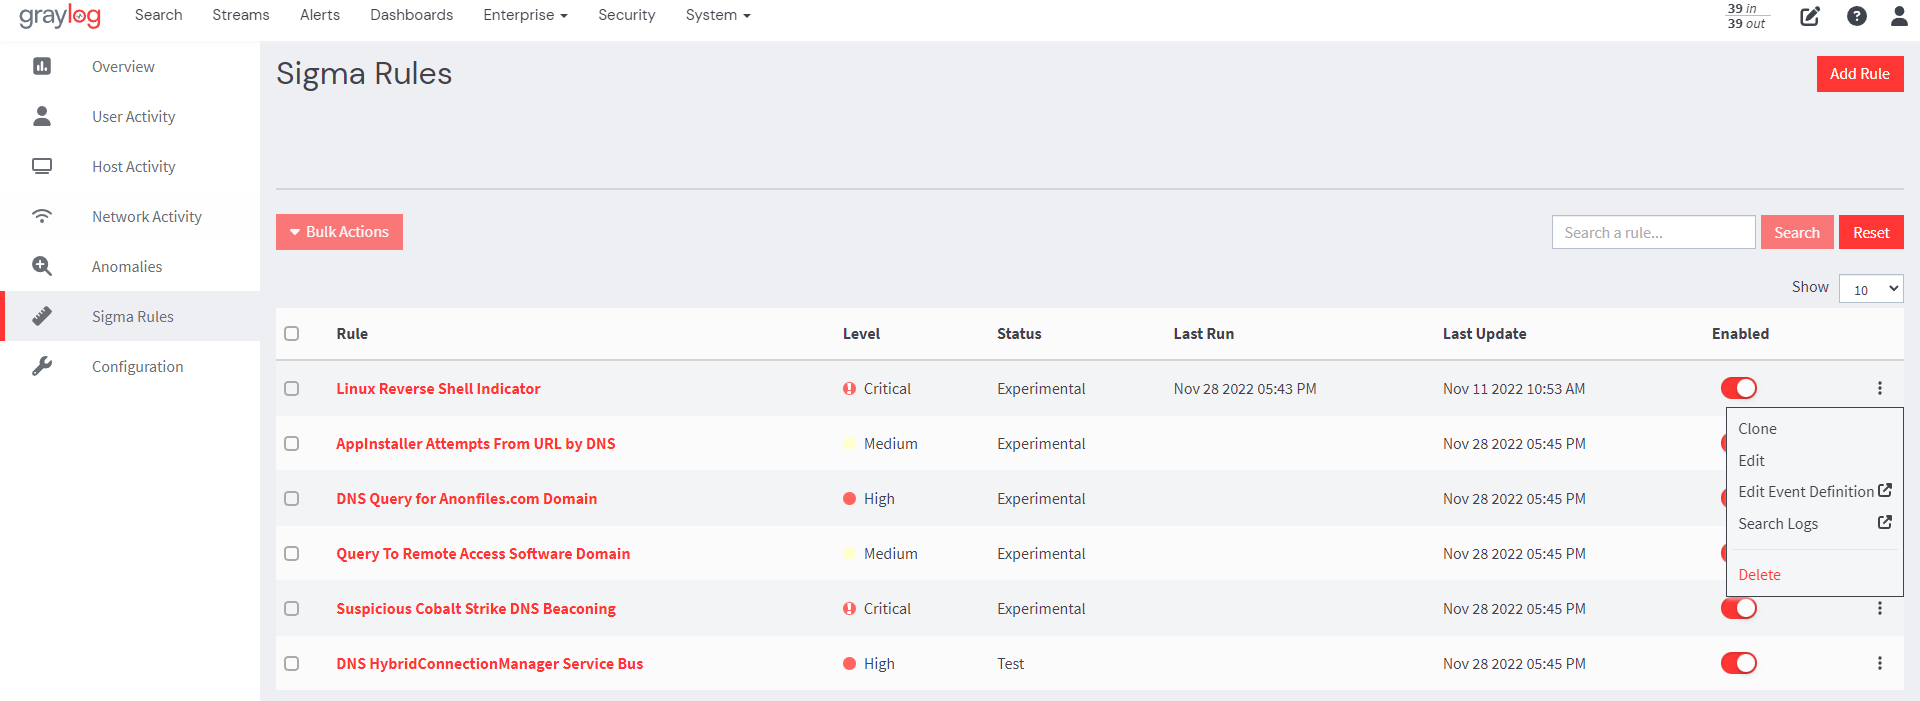
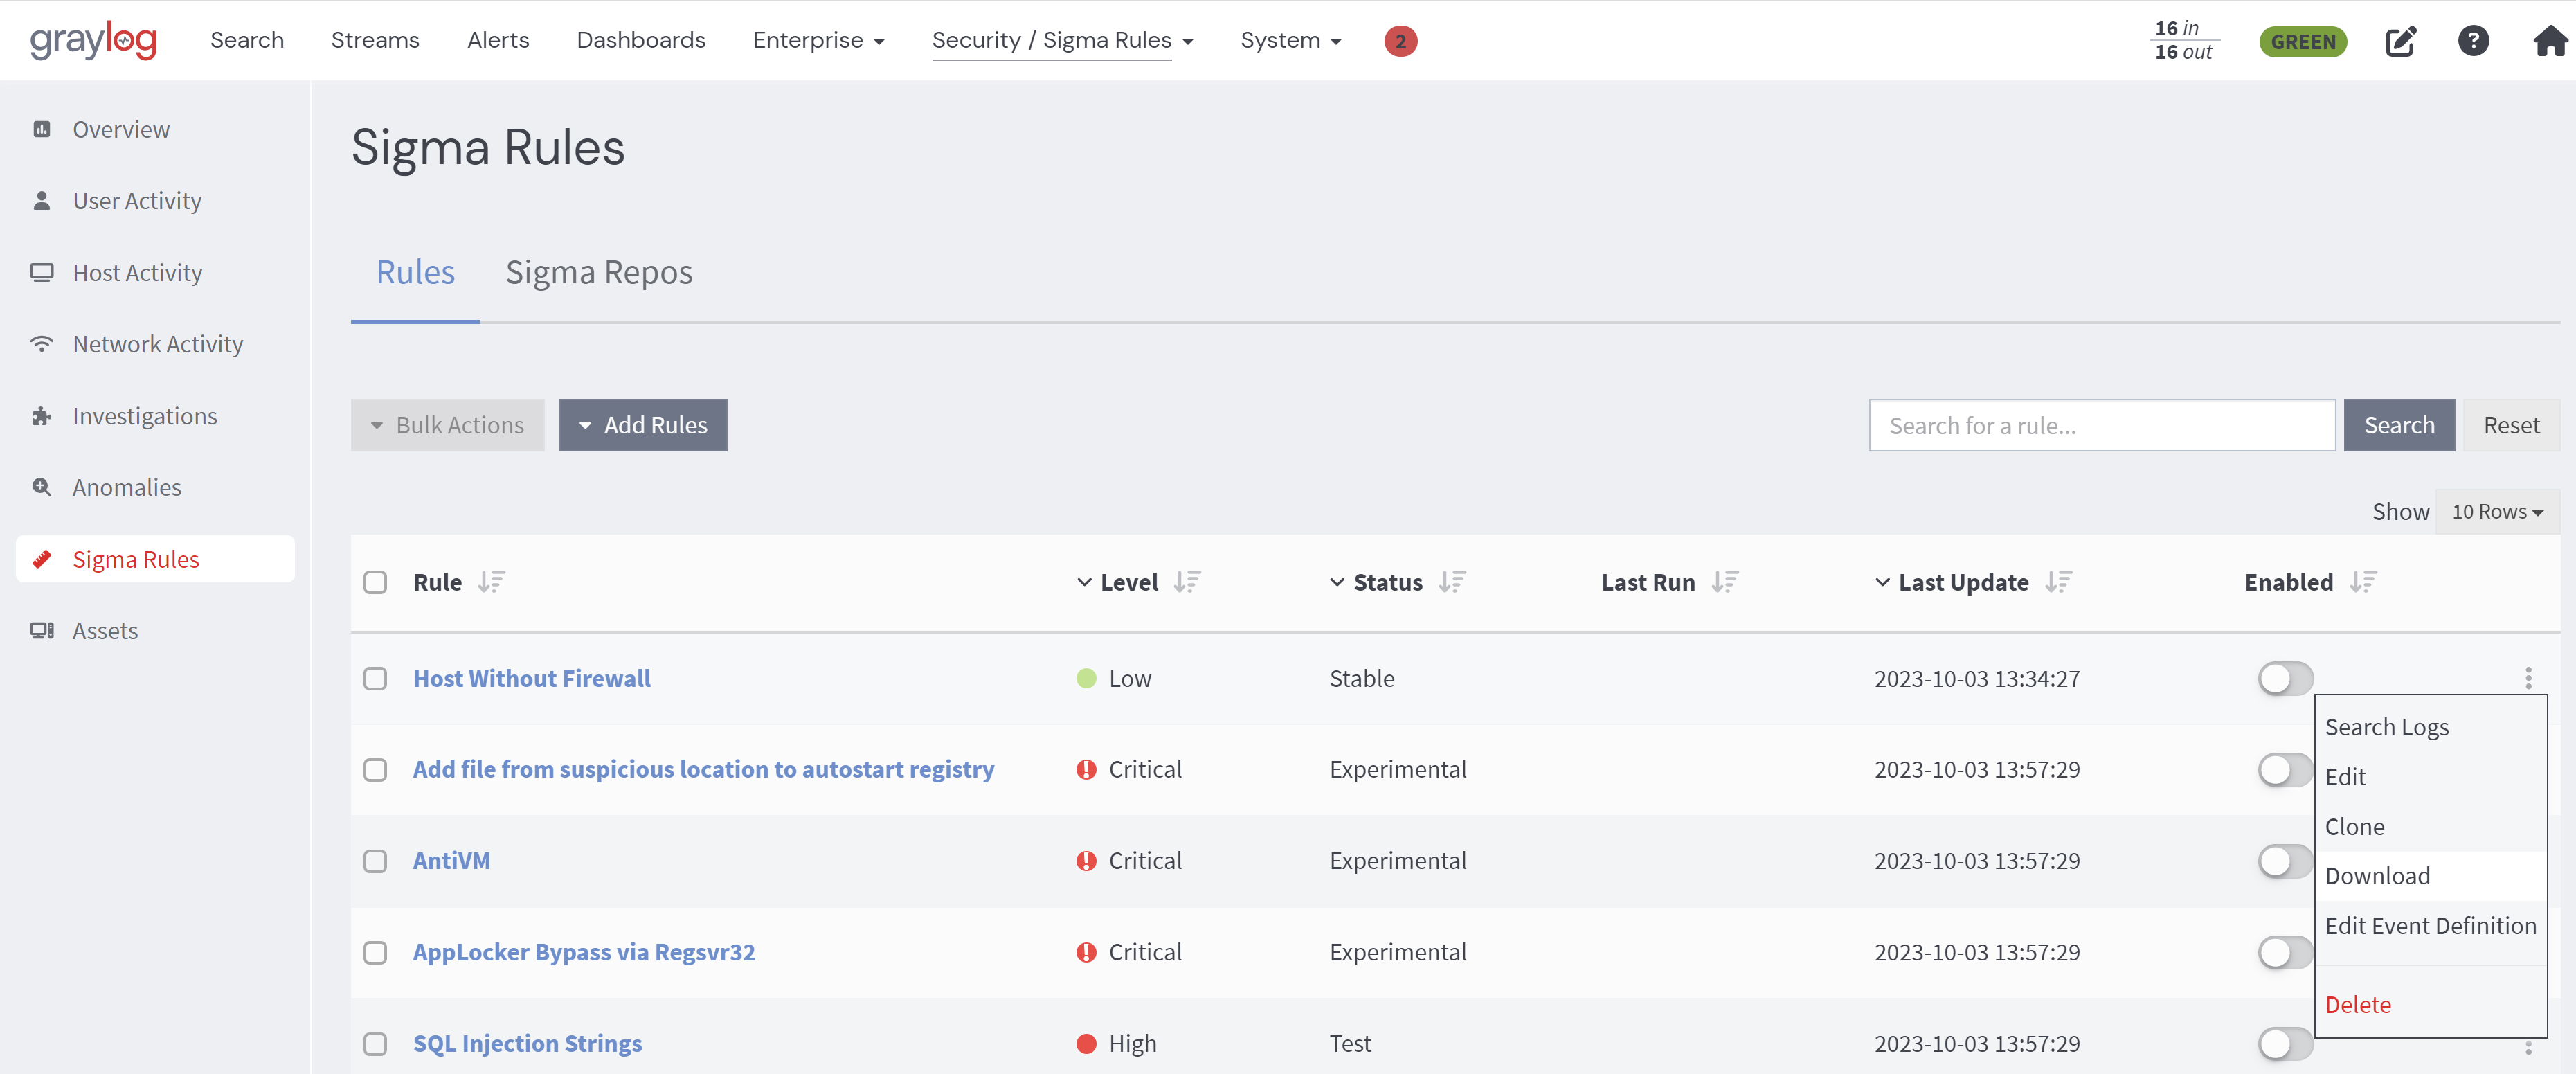
4. Every Sigma rule is automatically associated with an event definition when created; however, users can edit event definitions by clicking on the ellipsis against the rule to be modified and selecting the Edit Event Definition option. Users can add fields and notifications and change the title, description, and priority.
Each sigma rule imported into Graylog can also directly execute as a search, which can help both when writing new rules as well as understanding existing ones.
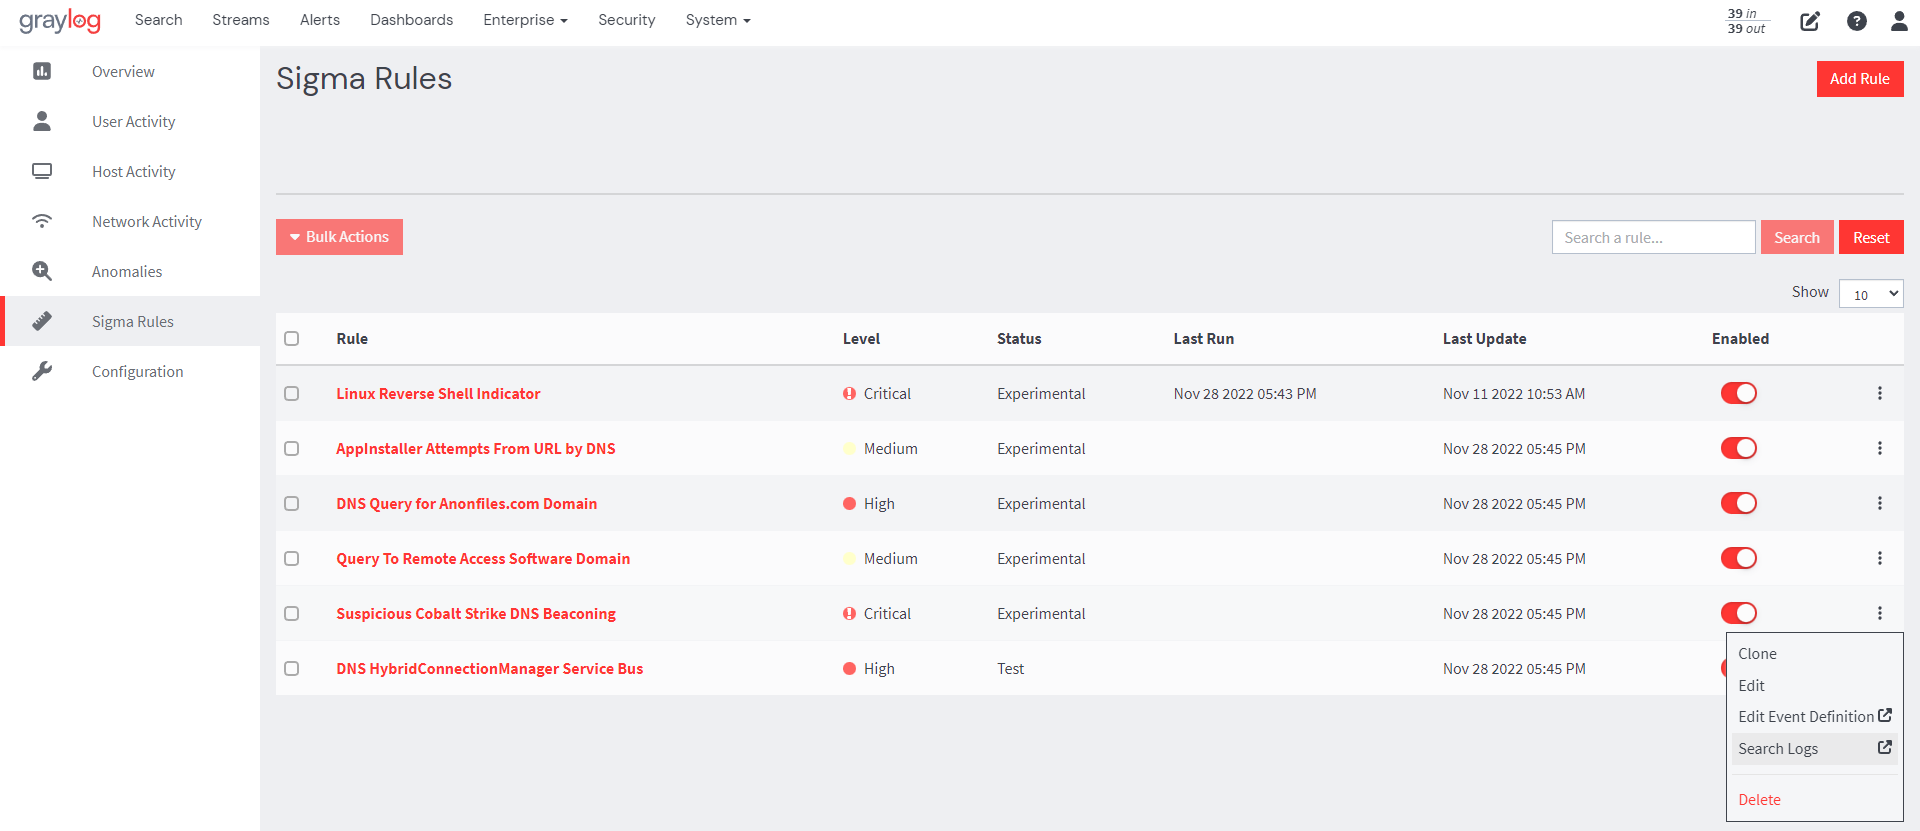
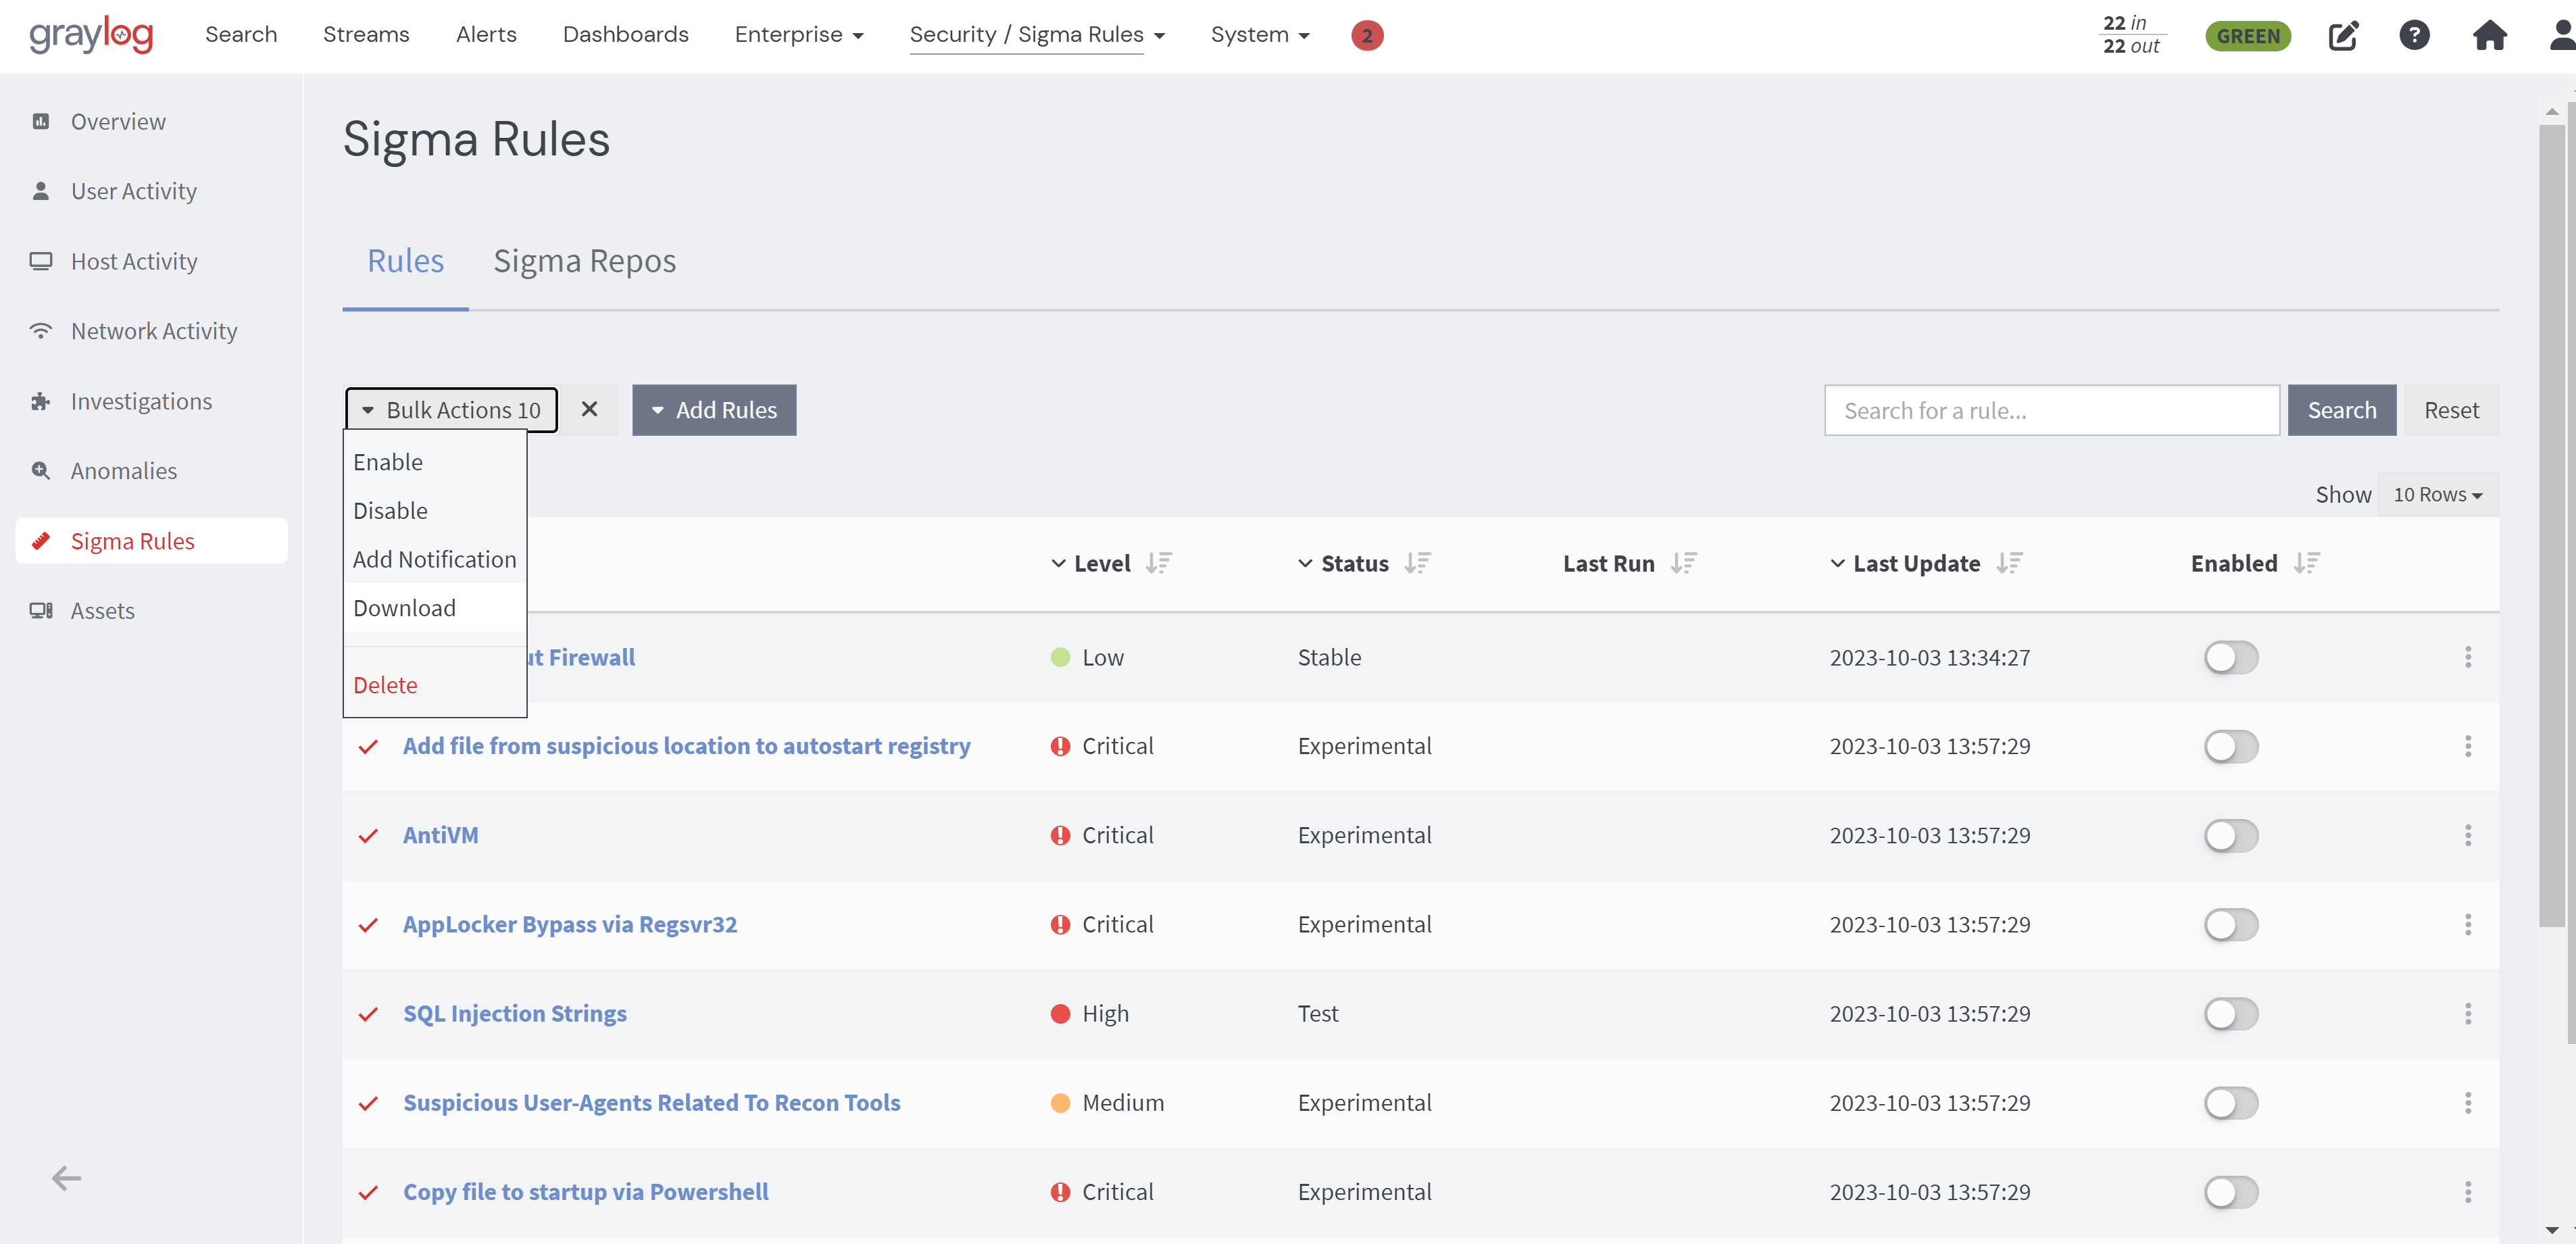
From the Sigma Rules page, users can then enable the imported sigma rules by toggling the Enable button. Users can also use the Bulk Actions feature to enable, disable, or delete all imported sigma rules.
Import Sigma Rules from Public Git Repo
Graylog 5.1 introduces the ability to allow users import sigma rules from any public Git repository in addition to SigmaHQ. All added repositories will be available and visible under the Import Rule menu with the rules they contain for users to select for import. To import sigma rules from repositories other than that of SigmaHQ, follow the steps below:
1. Navigate to the Sigma Config tab from the main Sigma Rules page and here, users have the option to either add the SigmaHQ repository, which will make the rules available without any additional configuration, or add a different repository after first configuring some options.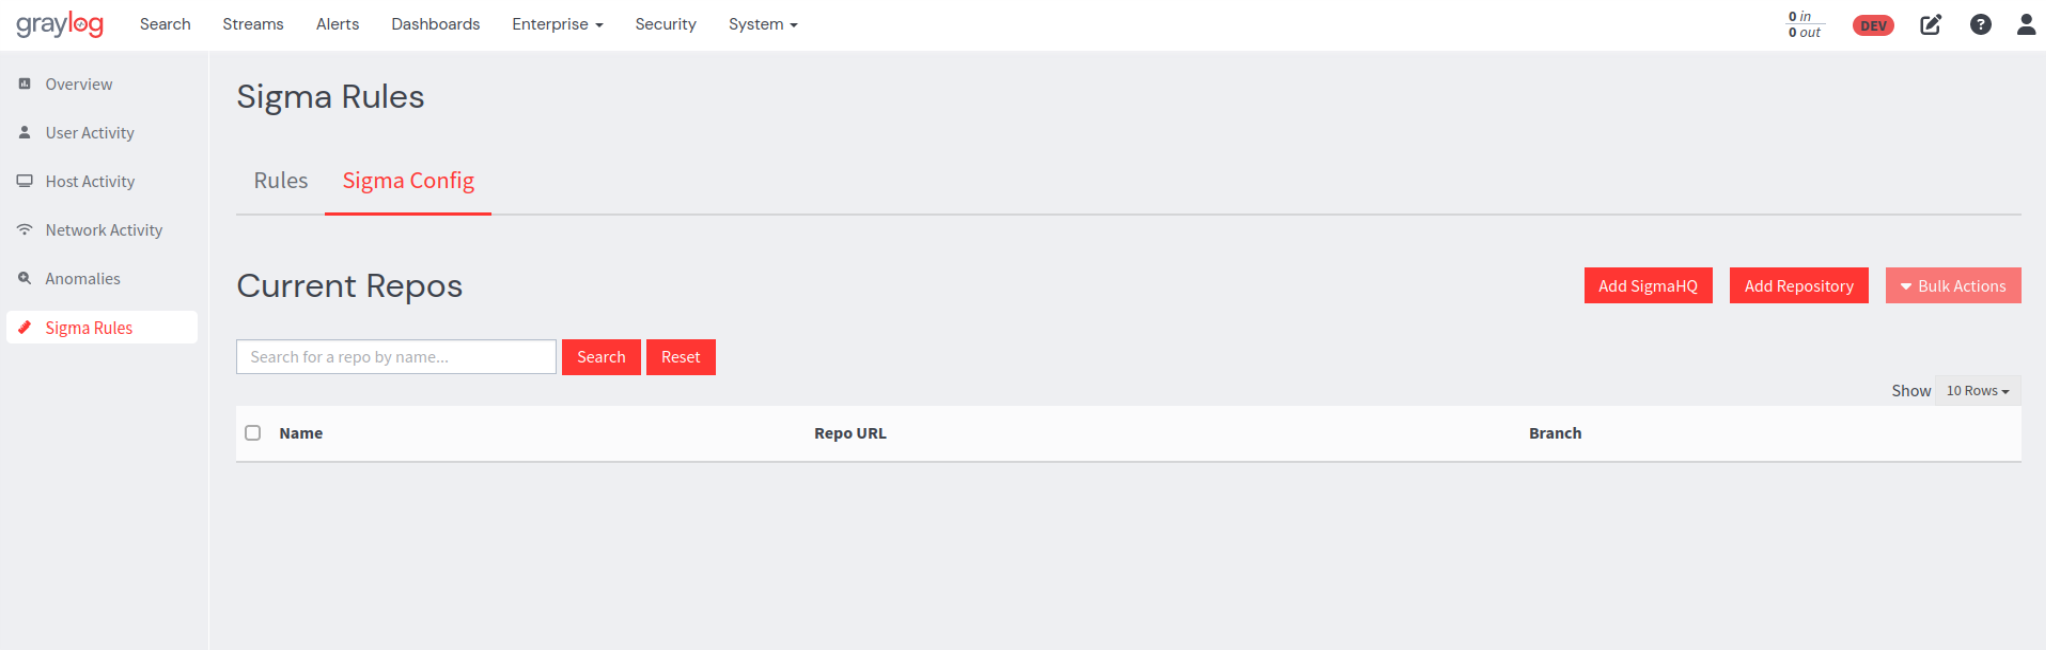
2. If theAdd SigmaHQ option is selected, the available rules will be automatically pulled, and SigmaHQ will be added to the list of available repositories. 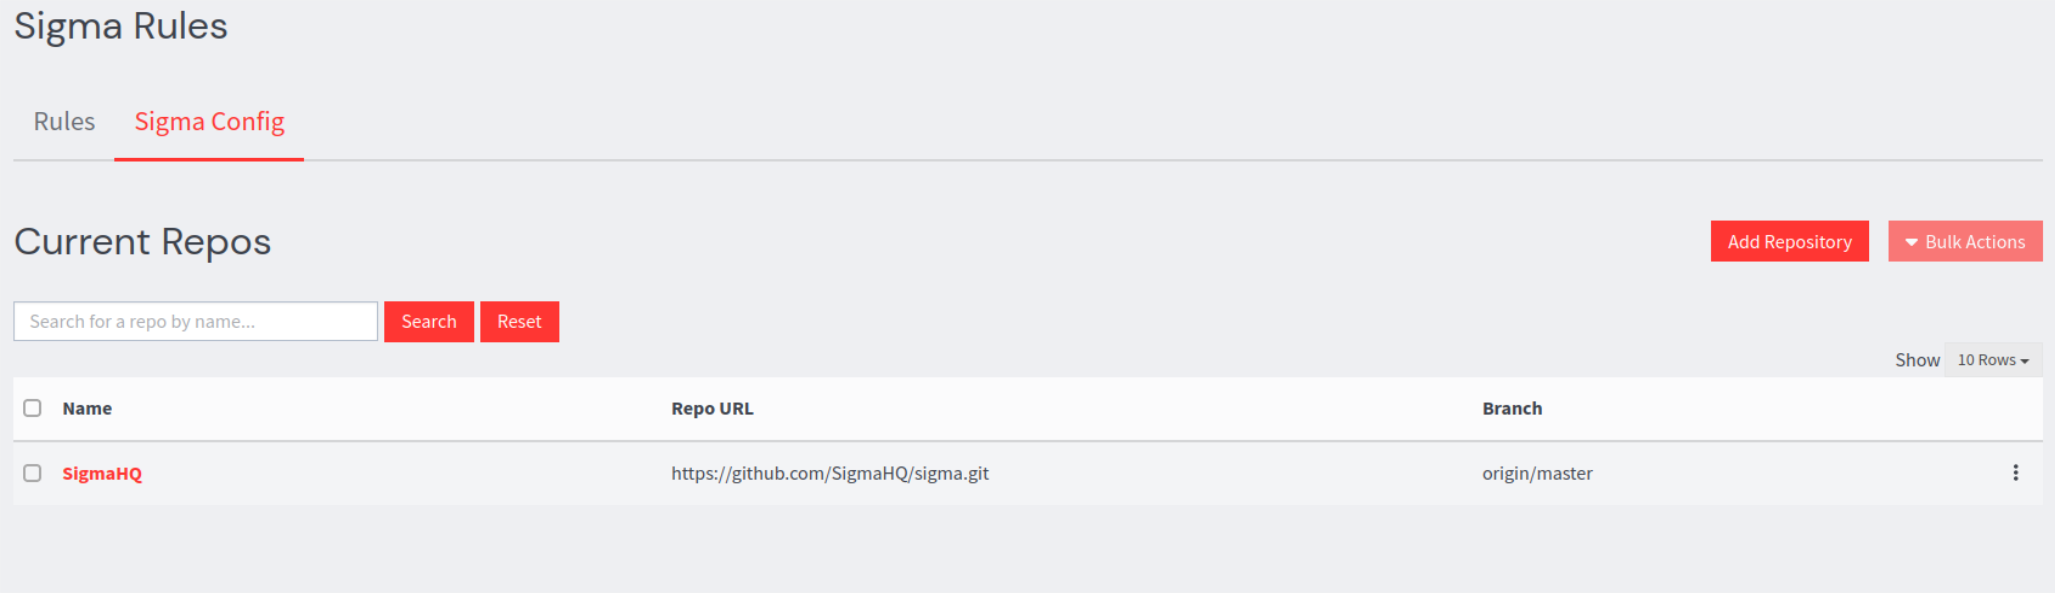
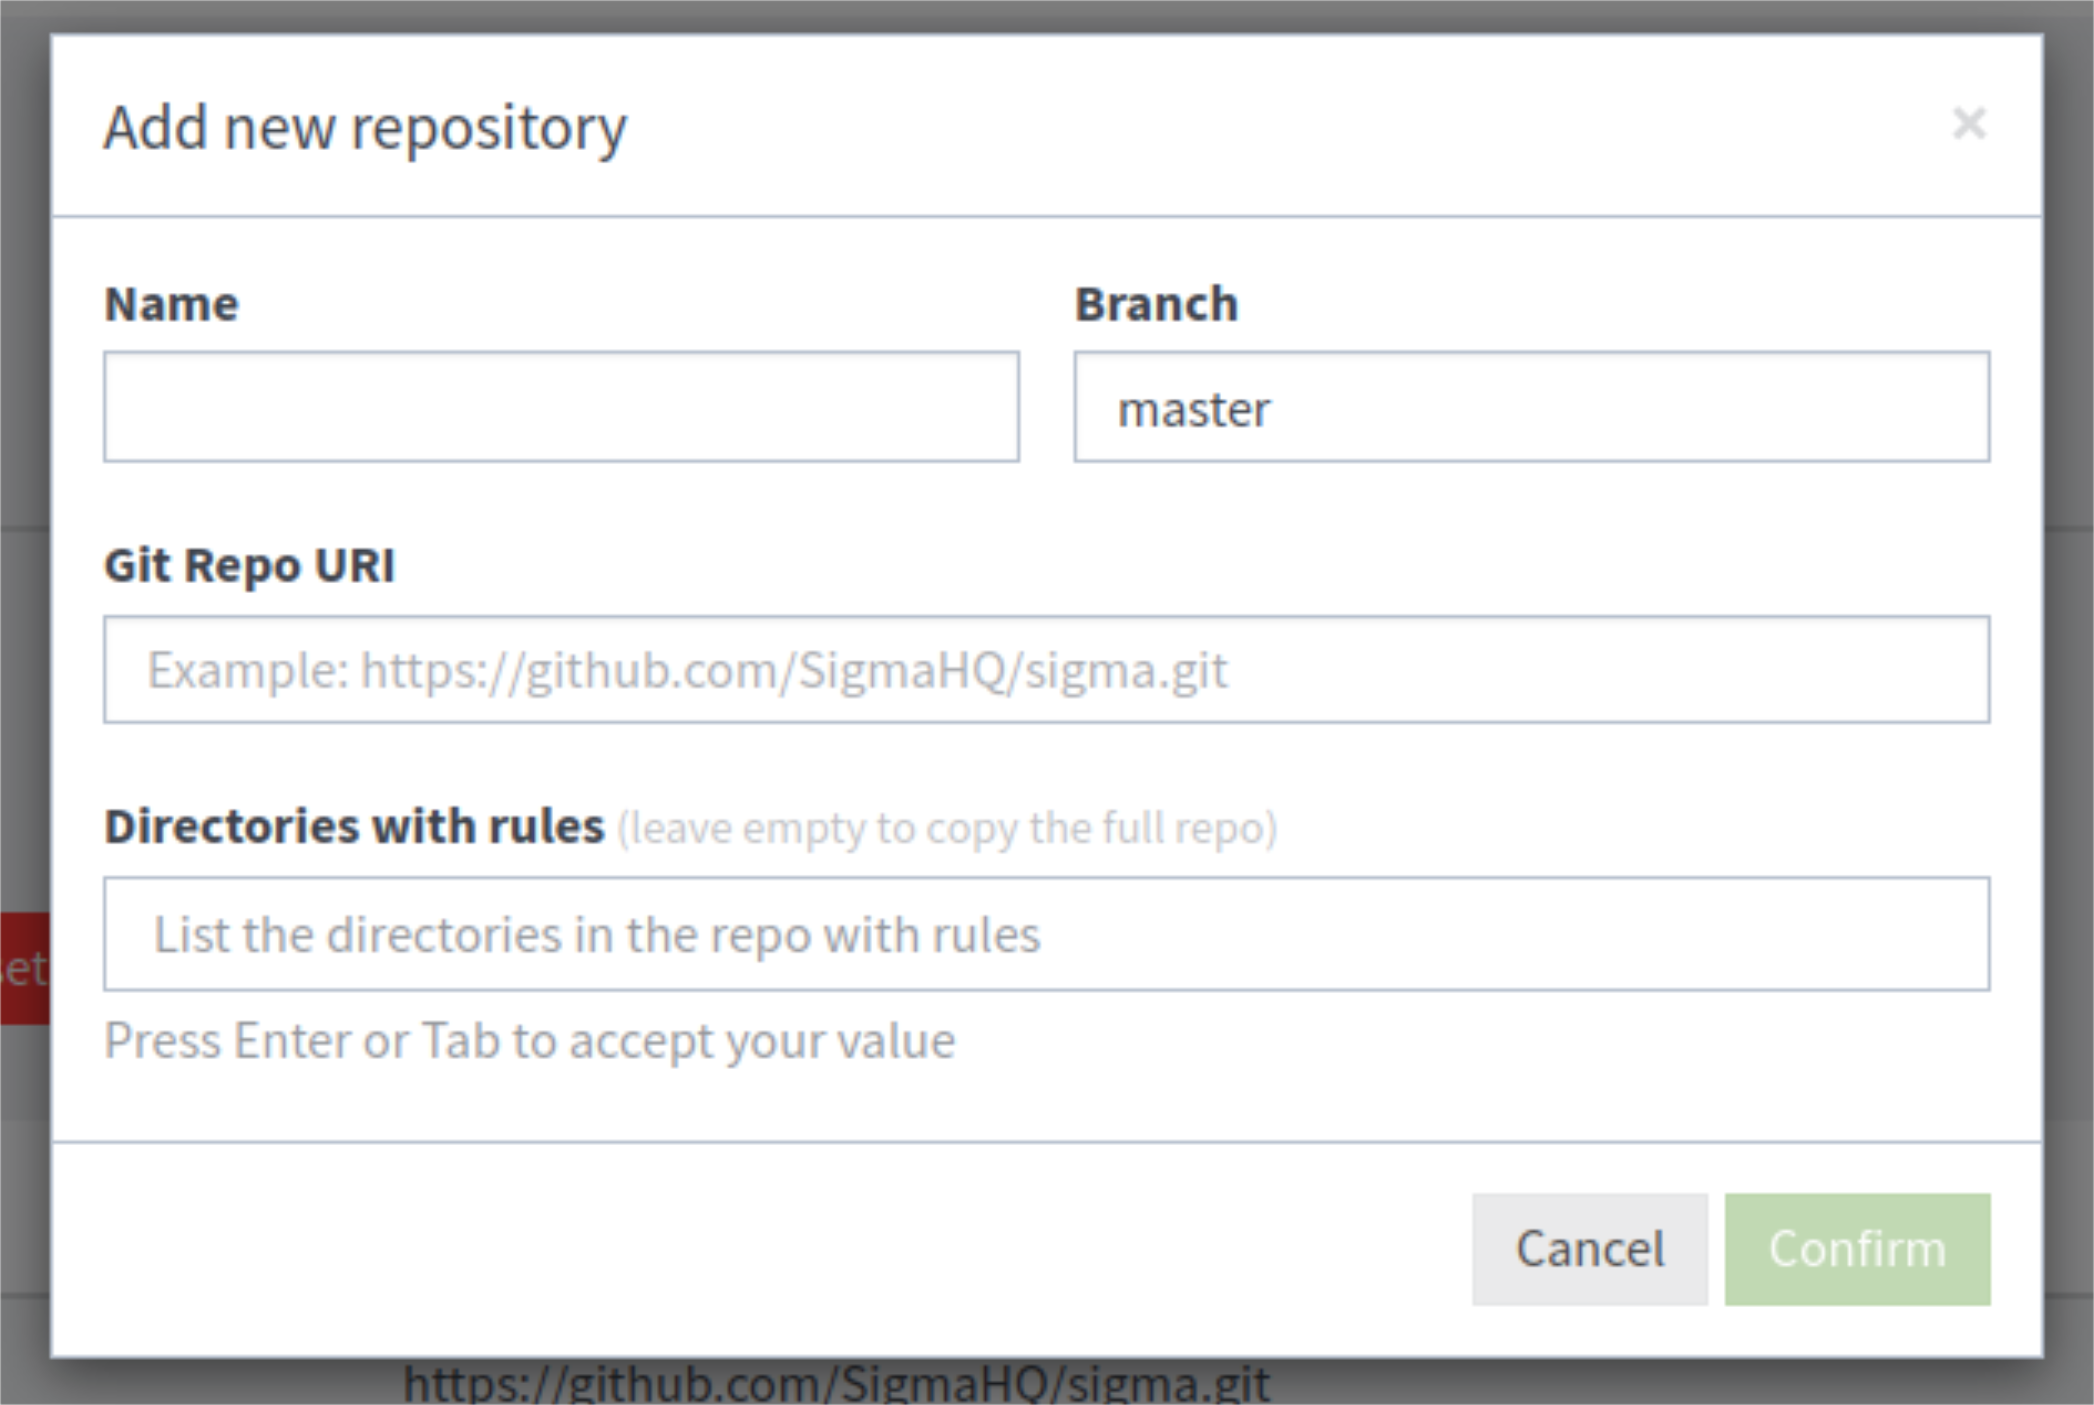
3. If users select the Add Repository option, a configuration modal will appear, prompting users to fill out the data fields listed below:
-
Name: The name of the repository as it will appear in Graylog. This can be any name, but it must be unique within Graylog.
-
Branch: A specific branch in the repository can be specified. If left blank, the Git repository will default to its default branch.
-
Git Repo URI: The URI of the repository e.g.
https://github.com/MyGitRepo/myrepo.git. -
Directories with rules: Allows users to only pull rules from specific directories within the repository. If left blank the entire repository will be scanned for rules.
4. When users confirm their configuration parameters, Graylog will scan and validate any .yml or .yaml files found in the repository, and correctly formatted and supported rules will be made available for import. Any file that is not .yml will be skipped. All .yml rule files found will be validated (i.e. correctly formatted according to the sigma specification) so that the rule is supported in Graylog. Users will see warnings about any rules that do not pass validation, and they will be skipped.
5. Once repositories are added they will appear in the list of current repositories.
During the Add Repository operation, Graylog pulls Git data to the disk of the system running the Graylog server to populate the list of available rules. Once the operation completes, the files are removed. By default, the files will be temporarily saved to a temp directory; however, users with unique system requirements or permissions have the option to specify where these files will be saved. This can be done by adding the sigma_git_repository_dir entry in their server configuration file. e.g. sigma_git_repository_dir=/etc/graylog/sigma_data.
Managing Imported Repos
From the list of imported repositories, on the Sigma Repos page, you can perform the following actions. These actions can be done on a single repository by clicking on the ellipses to the right of a selected repo.
-
Edit: Update the branch or directories from which to source rules.
-
Import All: Imports all valid rules in a repository into Graylog. A sigma rule configuration menu will appear with the standard rule options that will apply to all rules imported in this action.
-
Refresh: Refreshes the list of available rules, if for instance, rules have been added or changed in the Git repository.
-
Delete: Deletes the repository metadata from Graylog. The rules will no longer be available to import, but any rules that were added will remain.
Delete can also be done in bulk by selecting one or more repository check boxes and clicking Bulk Actions:
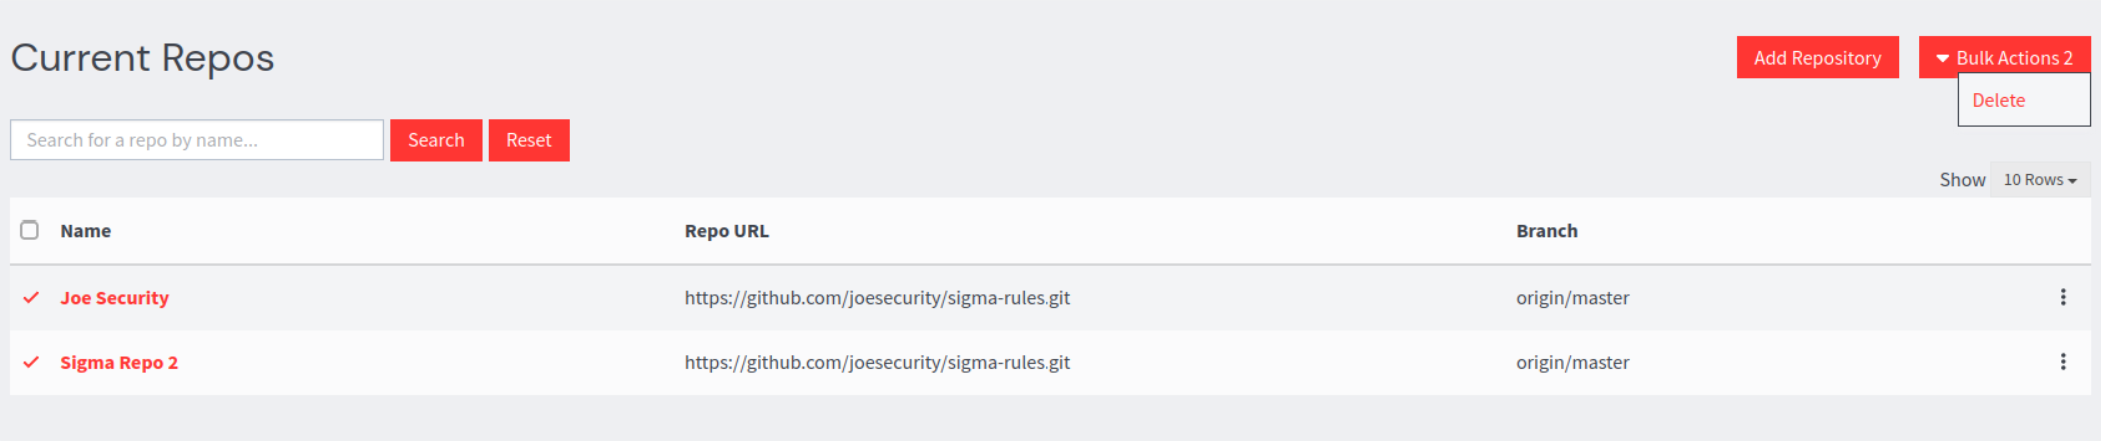
All added repositories will now be available in the Current Repos page.
Clicking a repository (and any sub directories) will show all valid rules in the repository to be selected for import.
Direct Import of Sigma Files
Along with being able to import sigma rules from Git repositories, rules can now be uploaded directly from the file system.
To open the upload window, select Upload Rules from the Add Rules drop-down.
In this window, you can select both individual sigma YAML files and .zip files containing multiple YAML files. By clicking on the corresponding file in the Selected Files list, you can modify the streams, notifications, and search configuration for each individual rule. To apply a configuration to all rules, click the Use these settings on all rules button. When this configuration is applied, all rules uploaded in a .zip file will have the same configuration.

Upon confirmation, all successfully imported individual rules will be removed from the Selected Files list. Any rule that failed to import will remain on the list, and a reason for the failure displayed.

The same process applies in the case of a .zip file that has invalid rules that cannot be imported, all valid rules will be imported, the failures will be displayed, and the .zip file will remain in the list.
Manually Add Sigma Rules
-
From your Graylog user interface, navigate to the Security tab and select Sigma Rules from the left pane menu.
-
On the resulting page, select Manual Add. This brings up a YAML editor where you can either directly make your rule(s) or copy from the sigma Git repository and paste it into the editor.
-
The YAML editor will notify you if required fields are missing (e.g. title) or if a field should be of a certain type (e.g. string) before you attempt to save and exit. If a user attempts to use an unsupported search modifier or inputs an aggregation in the conditions field, they will receive a notification that those inputs are not supported.
The Supported Sigma Rule Modifiers and Operators table in the next section provides users with currently supported features, rule specifications for Graylog, fields required by us that might not be required by the sigma specifications, and conditions and modifiers we do or do not support. This will help guide you when creating or importing rules.
When you create sigma rules, an event definition will also be created. This is because events need streams (optional streams) and search windows (to know over what time window and how frequently to search) in order to function properly. These options are configurable on the user interface and can also be specified in the YAML editor.
Download Sigma Rule Files
With the release of Graylog 5.2, you are now able to download sigma rule files individually or in bulk.
Download Single Sigma Rule File
To download a single rule, simply click on the ellipsis next to the desired rule and choose the Download option.
Download Multiple Sigma Rule Files
To download multiple rules at once, select the rules you want to download and then click on the Bulk Actions button. From the drop-down menu, select the Download option.
Once you initiate the download, your browser will automatically begin the process.
It is important to note that if you choose multiple files, they will be downloaded as a .zip file containing the rules' YAML files.
Supported Sigma Rule Modifiers and Operators
Graylog Illuminate ships with a lookup table that will translate some of the most common fields found in sigma rules within the SigmaHQ repository into GIM fields. This will allow many rules to work seamlessly within Graylog Illuminate processing. If those translations need to be overridden or added to, the lookup table can be customized. Refer to the Lookup Table Customization documentation for more information. Fields in the sigma rule will be translated using this lookup table each time a sigma rule search is executed. If no value exists in the lookup table, the field provided in the sigma rule itself will be used.
| Component | Sigma Spec Requirement |
|---|---|
| Title |
required |
| Id |
optional |
| Related |
optional |
| Status |
optional |
| Description |
optional |
| Author |
optional |
| References |
optional |
| Log Source |
required |
| Category |
optional |
| Product |
optional |
| Service |
optional |
| Definition |
optional |
| Detection |
required |
| Search-Identifier |
optional |
{string-list}
|
optional |
{field: value}
|
optional |
| Timeframe |
optional |
| Condition |
required |
| Fields |
optional |
| False Positives |
optional |
| Level |
optional |
| Tags |
optional |
| [arbitrary custom fields] |
optional |
| Special Field Values | Current Support |
|---|---|
|
|
Not Supported |
|
|
Not Supported |
| Value Modifiers | |
|
|
Supported |
|
|
Supported |
|
|
Not Supported |
|
|
Not Supported |
|
|
Supported |
|
|
Supported |
|
|
Not Supported |
|
|
Not Supported |
|
|
Not Supported |
|
|
Not Supported |
|
|
Not Supported |
|
|
Supported |
| Expressions | Current Support |
|---|---|
|
Logical |
Supported |
|
|
Supported |
|
|
Not Supported |
|
|
Supported |
|
Negation with |
Supported |
|
Brackets (parenthesis) |
Supported |
|
Wildcards (e.g. |
Supported |
|
Pipe (deprecated) |
Not Supported |
|
Aggregation expression (deprecated) |
Not Supported |
|
Near aggregation expression (deprecated) |
Not Supported |
Create a Sigma Rule with Regex
Sigma rules with regular expressions (Regex) can be imported or created and used the same way as any other rule.
Creating a rule by adding the sigma re modifier to a selection field name will trigger Graylog to interpret and craft the internal query with Regex. For example:
detection:
    selection:
        WorkstationName|re: '^[A-Za-z0-9]{16}$'
    condition: selection
This would result in the internal query: WorkstationName: /[A-Za-z0-9]{16}/
A large number of the rules published by SigmaHQ contain regular expressions that are not technically supported. We have added two cases where Graylog will translate the rules into Elasticsearch Regex dialect:
-
Digits -
\dwill be converted to[0-9]. -
Anchors -
^$e.g.^<regex>$- Elasticsearch syntax does not support anchor characters, but queries are anchored by default. Graylog will remove the unsupported anchor characters and add wildcards to achieve the same result.-
^<regex>$will be converted to<regex> -
^<regex>will be converted to<regex>.* -
<regex>$will be converted to.*<regex>
For more info on anchoring, click here
-
Regex Use Case Scenario
Here are some examples of how regex can be used in sigma rules:
-
A piece of malware is known to generate a
.tmpfile with a random eight character filename in the\Windows\System32directory. We want to detect file creation for any.tmpfiles created in the\Windows\System32directorythat are exactly eight characters long.
detection:
    selection:
        Image|endswith: '\svchost.exe'
        TargetFilename|re: '\\Windows\\System32\\[a-zA-Z0-9]{8}\.tmp$'
    condition: selection
-
An indicator of PowerShell abuse is very long commands. We want to detect any PowerShell commands that are 1000 characters or longer.
detection:
    selection_powershell:
        - CommandLine|contains:
            - 'powershell'
            - 'pwsh'
    selection_length:
        CommandLine|re: '.{1000,}'
    condition: all of selection*
Assigning Notifications to Sigma Rules
You can assign notifications for sigma rules within the sigma rules workflow. When you edit a sigma rule, a Notifications field with a drop-down menu option appears. If you have existing notifications configured, then they will appear in the Notifications field and when creating or editing a sigma rule.
Bulk Notifications
When importing one or more rules, you have the ability to apply notifications to all rules at once by selecting from the drop-down and selecting Use these settings on all rules. Additionally, individual notifications can be selected for each specific rule.
For existing rules, one or more can be selected, and then users can click Bulk Actions > Add Notification .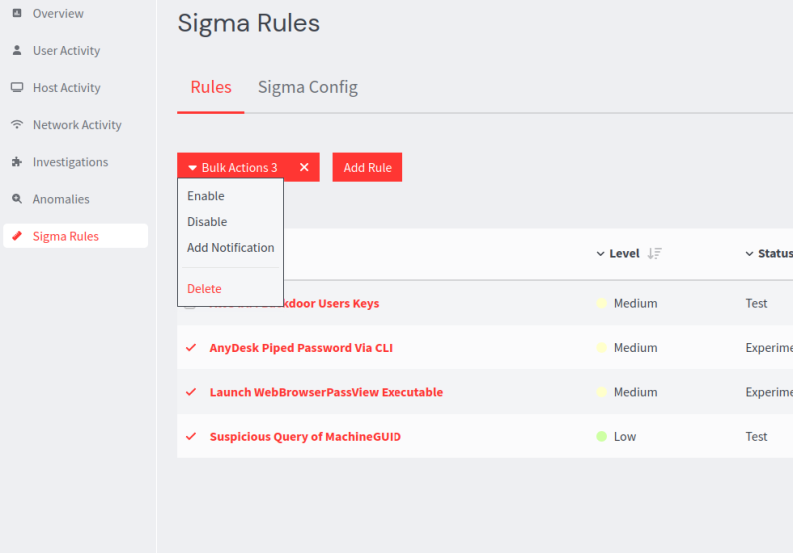
Here, users can select which notifications to add.