An event refers to specific circumstances in your environment that would cause a change in normal behavior. For example an event could be changes made to firewall policies or a failed login attempt by a blacklisted IP. Graylog helps you manage events by allowing you to define the specific paramaters of an event and alerts you when your log data matches these parameters. In this article, we review how to create and manage event definitions, including how to attach an alert to the event.
There are two main ways to create a new event definition:
Create an Event Definition Through the Wizard
In order to create an event definition through the wizard in the Graylog interface:
-
Navigate to System > Alerts.
-
Click on the Event Definitions tab.
-
Select Create Event Definition found in the upper right corner.
You will be presented with a set of dialogues where you can set the event's title, description, and priority.
Define a Priority
The priority of an event is a classification for user purpose. Events may be prioritized from 1 to 3 (1 = low, 2 = normal, and 3 = high) according to their importance. This assessment can help you triage events, which is a necessary practice in security investigations. The priority of an event will be displayed as a thermometer icon in the overview and will be written into the alert.
An example of a low prioritized event (priority level1) may be one failed login in 10 minutes. A normal prioritization (priority level 2) may be 2 - 3 failed logins in 10 minutes. Over 15 failed logins in 10 minutes could be considered "high priority" (priority level 3) because this could mean that a person or bot is trying to break into a system.
Use a Filter
By combining a filter and an aggregation, you can specifically describe the criteria that would constitute an event.
-
In the Filter menu define a filter by providing the search query that your messages should match; the query should be in the same syntax as any search from theSearch page.
-
Select a stream in which the message can be found.
-
Define the window of time that the filter will search backward to match messages.
The search will be executed at the given interval. If the filter matches, an event will be created. 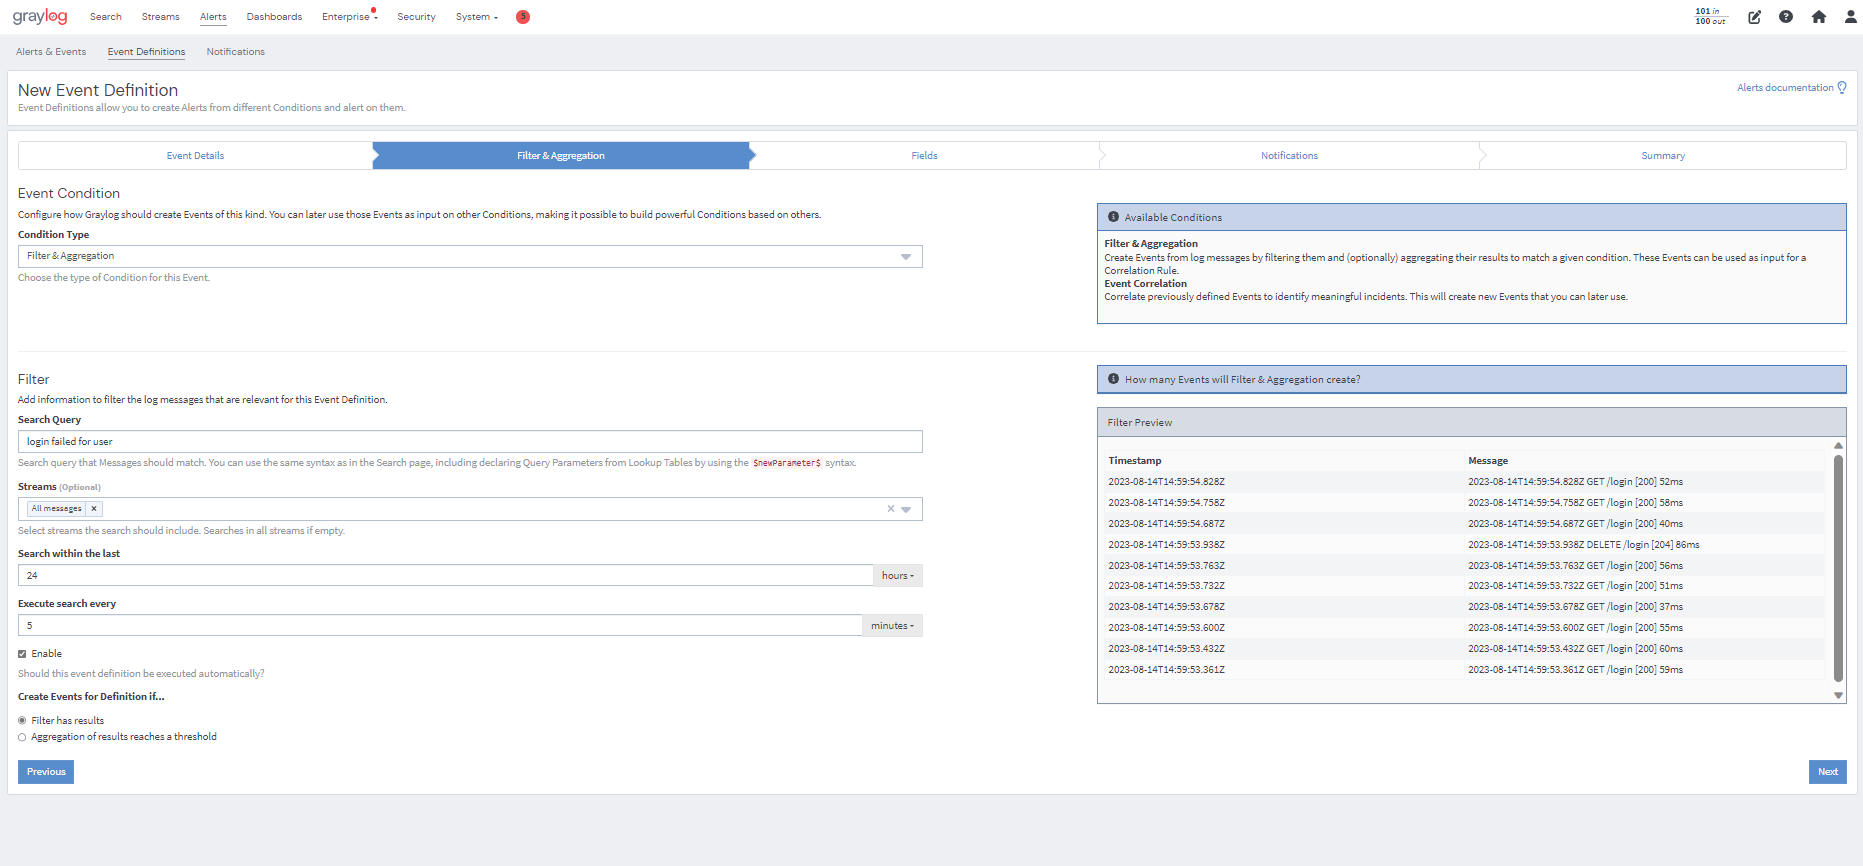
An example of using a filter to define an event could be filtering against a search for failed user logins by further refining it to only include certain users. You may also define the window of time to be the last 24 hours or the last 3 days.
If the defined filter matches messages currently on the Graylog server, they will be displayed in the Filter Preview panel on the right.
Create an Aggregation
An aggregation is the combination of two or more entities. The new entity processes specific and meaningful results. Aggregations can run a mathematical operation on either a numeric field value or the raw count of messages generated that match the filter. Aggregations can group matches by a selected field before making the comparison.
For instance, if the field username is defined, then it is possible to alert on five successive failed logins by a particular username. In this example, an event definition will be created if there are more than 6 consecutive failed login messages that pertain to the targeted user.
Create a Field
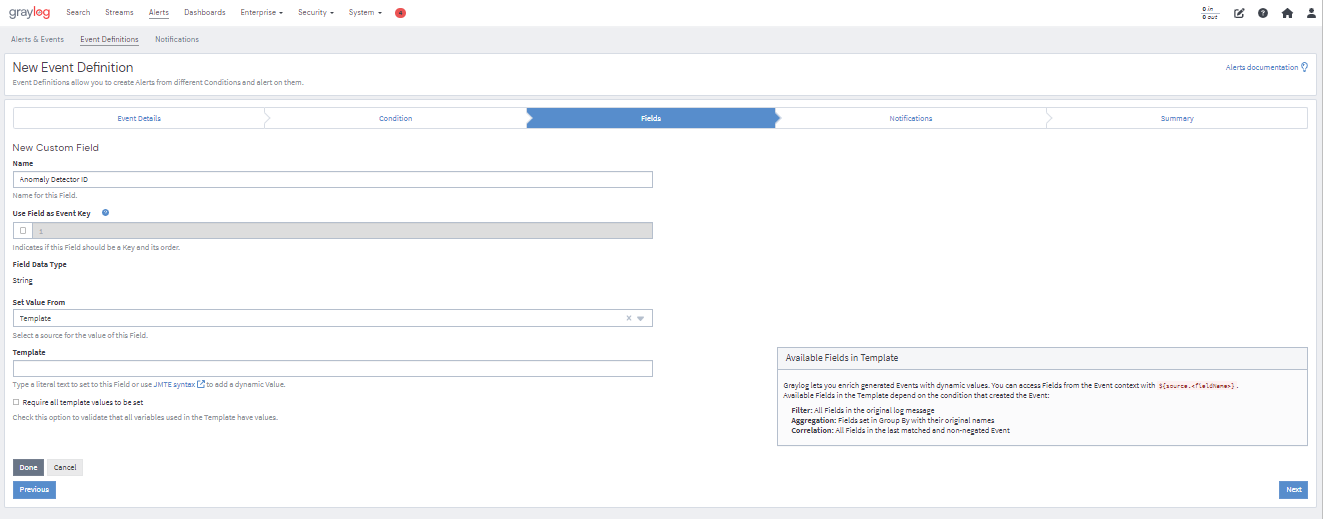
You can also create a custom field as part of an event definition in the Fields menu. These fields allow an event generated from this definition to populate data from the original log into the Graylog events index. This prevents you from having to run subsequent searches to get vital information. These fields can also be used to limit the amount of data sent to an alert target, and you can run aggregations that include custom fields.
These fields can be accessed within an alert and can be used as part of the Operations event correlation feature.
In the event definition menu below, a new custom field is created by entering a title and source.
Attach an Alert
In the Notifications menu, you can also attach an alert to your event definition. See the Alerts article for more information on how to set up an alert and the alert types available.
Create an Event Definition Directly From Search Results
You may also click on any value in your search results to create an event definition. This event definition will generate tailored alerts that include only the specific part of the query that you want to be alerted on. To do so:
-
Go to your search results.
-
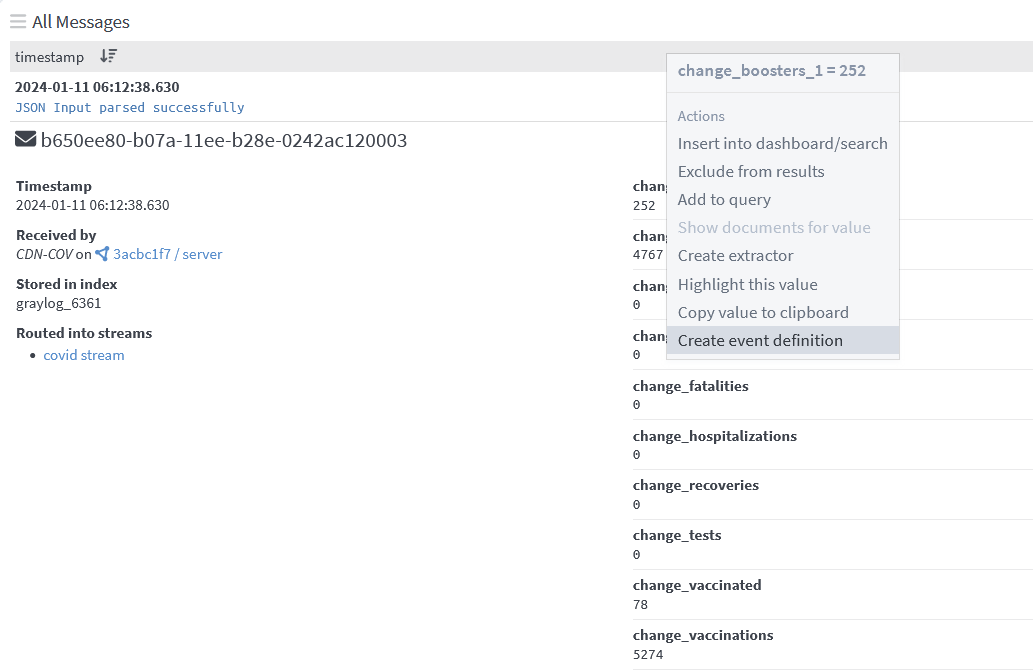
Click on any value in an aggregation widget, log view, or message widget.
-
Select Create event definition from the drop down menu.
-
Pick one of the Strategy by options in the dialogue that appears. Click on Show strategy details to select or deselect any parameters you would like to add to the event definition. The parameters you select here will populate in your event definition under Filter & Aggregation.
You may select any of these options:
-
Exactly this value: Displays parameters related to your current search. You may add or remove any of these.
-
Any in widget: Displays parameters related to the selected value.
-
Custom: Allows you to include any part of the search query.
Remember to click on Show strategy details to see a full list of clickable options.
 Hint: In addition to the three options displayed above, you may also be presented with other options depending on the value you select. For example, if you select an aggregation widget metric value, you will be presented with additional Any in row and Any in column option.
 -
-
Click Continue Configuration. You will be redirected to the Event Definitions page. Start by giving your event definition a unique title and filling in other details in Event Details. The selections you made in step 4 will be populated in Filter & Aggregation. You may also add custom fields and alerts in this menu.
-
After reviewing the summary of your new event definition, click on Create event definition. A new event definition will be created, and you will receive alerts for the given condition.
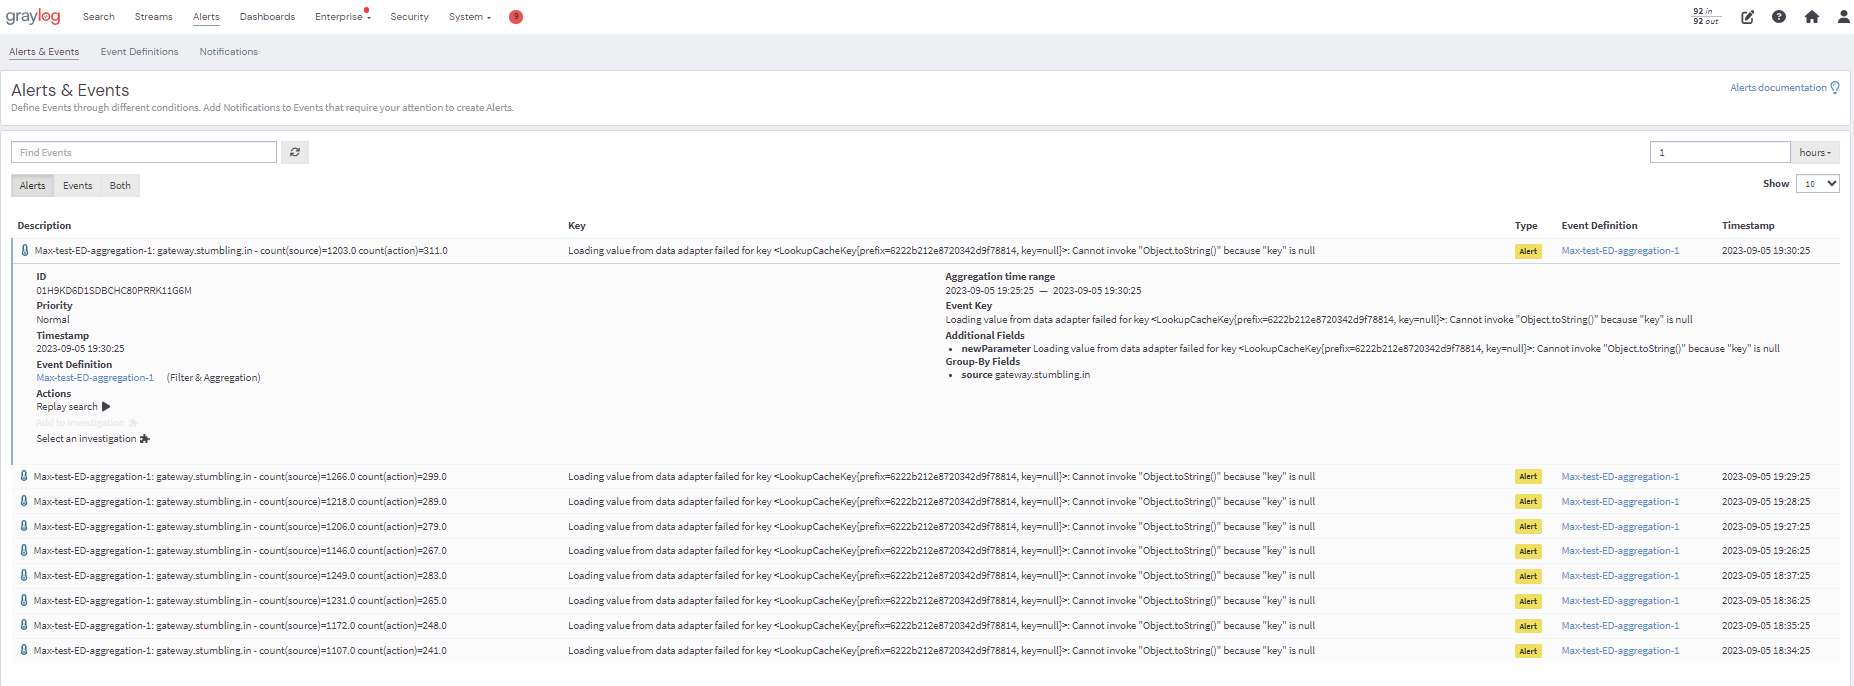
Manage Defined Events
All defined events are available on the Alerts & Events page. You can also find more details about each entity, such as the priority, status, and scheduling, on the Event Definitions page. Click on the information icon, found in the scheduling column to get more information about status, last execution, next execution, next time range, and queued notifications. The Event Definitions page is bulk friendly and allows you to delete, edit, and disable multiple entities simultaneously. Under More Actions you will find the ability to edit, duplicate, disable, and delete definitions.
![]()
Replay a Search
You can replay the specific search that first triggered an event. Select an entity on the Alerts & Events page to access the replay search option, which can be found under Actions. You may review the search results and messages to gather important details in investigating the event. Note that this page can also be bookmarked for future reference during investigations.
Filter with Dynamic Lists
The following section exclusively pertains to a Graylog Enterprise feature. To learn more about obtaining an Enterprise license, please contact the Graylog Sales team.
Dynamic lists allow you to define a filter where some of the search arguments are parameterized. Every time an event definition is being checked, these parameters are replaced with the result of a dynamic list.
Dynamic lists (such as a lookup tables) can be used to create event definitions:
-
Go to the Alerts page.
-
Navigate to Event Definitions and click on Create Event Definition.
-
Enter the required information for Event Details.
-
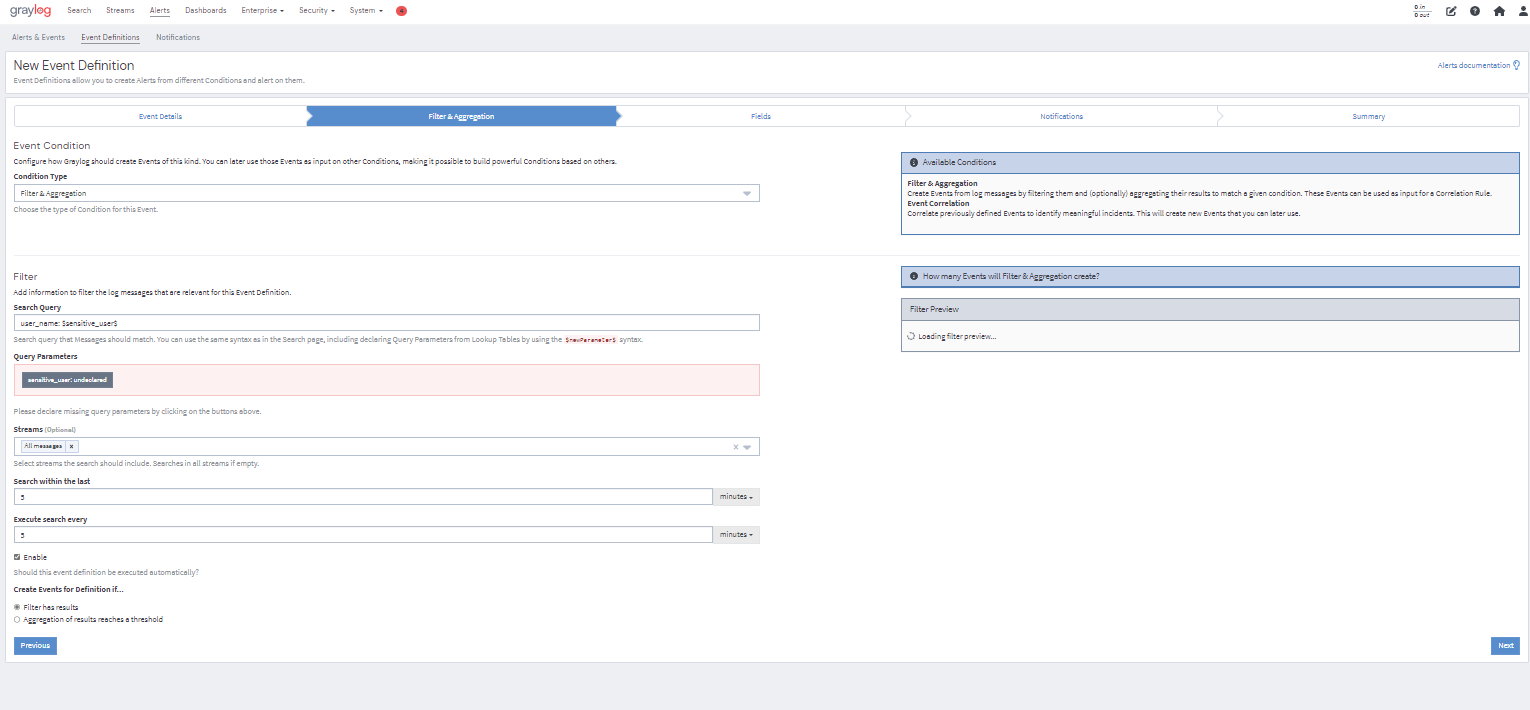
Then select Filter & Aggregation as the Condition Type.
-
Enter your search query using the same syntax as used on the Search page.
-
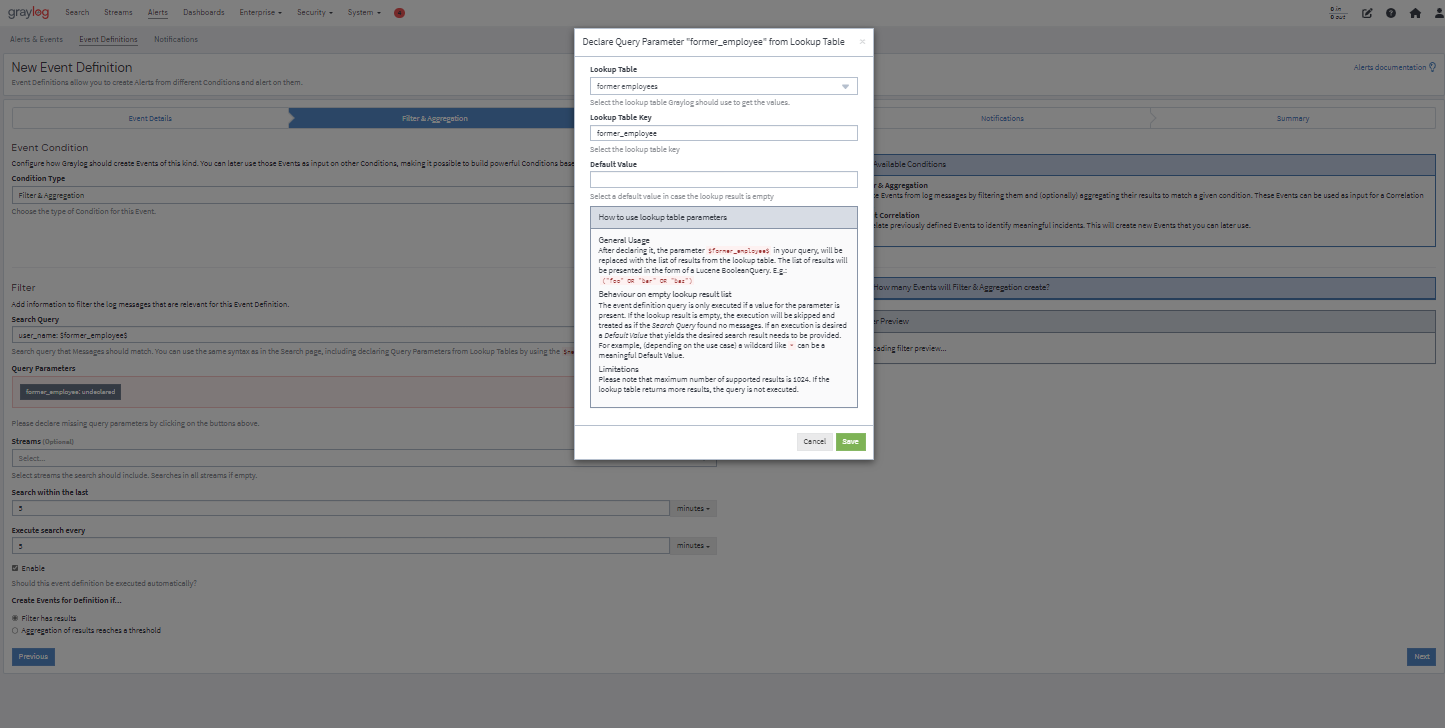
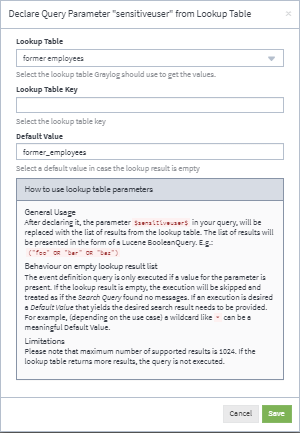
Click on the undeclared parameter that shows up in the Query Parameters box. Enter the required information in the menu that appears and selectSave.
-
Note that you can validate the outcome in the Filter Preview section before you proceed.
-
Finally, click Create event definition under the Summary tab. Now you will receive alerts based on this event definition.
Dynamic Lists Use Case
In this scenario, the user wants to monitor a list of former employees for safety reasons. They want to receive an alert if anyone on the list tries to log in to the company system. Generally, this type of query is usually difficult to maintain because of the immense number of values to compare. Using a lookup table allows them to compare a log value to any value within the list. The lookup table will be updated to include all former employees, including ones that have recently left the company.
In the event definition menu below, the parameter $former_employee$ is backed by a lookup table that returns a current list of former employees. After creating the event definition, the user will be alerted on any login attempts from anybody on the list.