Self-Managed OpenSearch
Review the following information for Graylog installations deployed with self-managed OpenSearch.
Installing OpenSearch
The installation process for OpenSearch is similar to Elasticsearch. Noteworthy differences between Elasticsearch and OpenSearch from an installation perspective include the software packages and minor differences in parameter names within configuration files.
When installing the OpenSearch software, its destination should be different from any existing Elasticsearch software. Depending on how the OpenSearch software is deployed, be mindful of where the archived contents are extracted (e.g. tarballs). This will prevent overwriting Elasticsearch configuration files and data in the indices.
At the time of writing, OpenSearch is available for download via HTTP and installation via the following package types depending on your operating system and/or method of deployment:
-
Tarball
-
RPM package (available in v1.3.2 & above)
-
YUM repository
-
Docker image
The configuration file for an OpenSearch node also has a similar location to an Elasticsearch node:
-
Linux (RPM/YUM):
/etc/opensearch/opensearch.yml -
Tar-ball:
/opensearch-1.x.x/config/opensearch.yml -
Docker:
/usr/share/opensearch/config/opensearch.yml
Graylog has tested upgrades of Elasticsearch versions 6.8.23 and 7.10.2 to OpenSearch versions 1.1-2.3 on the following platforms:
-
Red Hat Enterprise Linux 8 (RPM+YUM installation)
-
Ubuntu 20.04 LTS (Tar-ball installation)
-
Docker Engine v20.10.17
For specific installation instructions, see the comprehensive OpenSearch installation documentation.
Upgrading to OpenSearch
There are three different approaches to upgrading from Elasticsearch to OpenSearch.
- Full-cluster restart upgrade (in-place)
- Rolling restart upgrade (in-place)
- Restore snapshot (new cluster)
The recommended upgrade process for most of the Graylog community is the full-cluster restart upgrade (in-place). Therefore, this method will be the primary focus of our upgrade guide. You can, however, find a high-level overview of each method in the following sections to help you choose the right method for your needs and environment.
In-Place Upgrades
In-place upgrade methods repurpose your existing Elasticsearch nodes and are more like a software upgrade than a software migration. You will not need to create and restore a snapshot of your Elasticsearch data with an in-place upgrade.
The two types of in-place upgrades are a full-cluster restart and a rolling restart.
There are several differences between the two methods, most importantly, varying levels of complexity, risk for error, and downtime. The full-cluster restart process shuts down the entire Elasticsearch cluster while the rolling restart method only shuts down and upgrades one Elasticsearch node at a time until all nodes in the cluster are running OpenSearch.
Full-Cluster Restart
The full-cluster restart upgrade is generally considered the simpler of the two in-place upgrade methods. This method consists of shutting down the entire Elasticsearch cluster, installing and configuring the OpenSearch software, copying data from Elasticsearch data.dir file systems to OpenSearch data.dir file systems, and then starting up the OpenSearch cluster. This method requires your Graylog nodes to have sufficient available disk space to store all incoming messages in the journal while OpenSearch is installed and configured.
Before you install OpenSearch, find the PATH assigned to the data.dir of your Elasticsearch nodes. You can find this parameter and its assigned value within the elasticearch.yml files. This assigned value defines the file system location of your Elasticsearch indices and other data. It is important to note this location so you do not overwrite it during the installation or configuration of OpenSearch. If you plan to reuse the same file system location of your former Elasticsearch nodes, then there is no concern for overwriting your Elasticsearch indices.
After the OpenSearch software is installed and configured on each node of the Elasticsearch cluster, copy the data within the Elasticsearch nodes data.dir to the OpenSearch nodes data.dir. This enables you to reuse your existing data in the new OpenSearch cluster while offering a potential method to revert. It is technically possible to configure OpenSearch to use the same data.dir as the former Elasticsearch nodes; however, doing so prevents you from being able to revert to the previous working state.
Once the Elasticsearch data has been copied into the OpenSearch data.dir file system locations, all of the nodes of the OpenSearch cluster can be started. When the OpenSearch cluster reaches a "green" state, you will then need to restart all of your Graylog nodes to complete the upgrade process.
As the entire Elasticsearch cluster is offline in this method, no changes can be made to its data; therefore, no time is spent waiting on replication between shards, unlike with the rolling restart upgrade.
Rolling Restart
A rolling restart upgrade is defined here as keeping your Elasticsearch cluster online throughout the process of upgrading it to OpenSearch. This method is more complex, slower, and prone to error than a full-cluster restart, and it requires replicas for every index of every Graylog index set; however, it allows for the indexing of incoming messages and search queries to be serviced by Graylog throughout the upgrade process.
Steps involved with the rolling restart method span, but are not limited to, disabling and re-enabling shard allocation when you upgrade an Elasticsearch node to OpenSearch to waiting for the cluster to perform replication in the "yellow" state to then return to a "green" state before proceeding to upgrade the next Elasticsearch node in the cluster.
These steps can complicate what might otherwise be a more straightforward process to upgrade the entire Elasticsearch cluster while it is offline. And like a full-cluster restart, you need to make copies of Elasticsearch data.dir file systems for OpenSearch to reuse in a different file system location for its nodes' data.dir, unless you wish to forgo the potential of reverting.
Once all nodes have been successfully upgraded to OpenSearch and the cluster is in a healthy "green" state, the Graylog nodes must then be restarted as the final step in the upgrade process.
OpenSearch provides a detailed step-by-step description of how to upgrade Elasticsearch node(s) to OpenSearch node(s), including notation on specific steps to repeat when doing a rolling-restart upgrade.
New Cluster Upgrade
The new-cluster upgrade method requires a duplicate OpenSearch cluster configured exactly like your existing Elasticsearch cluster. This method can be done with virtual machines or other platforms that may not require new hardware and financial resources.
After installation and configuration validation, while running both clusters simultaneously, a snapshot of the data is created on the Elasticsearch cluster and restored to the OpenSearch cluster. After that, you must reconfigure Graylog to use the new OpenSearch cluster. Restart Graylog for the changes to take effect.
Another way of framing this method is a blue/green deployment. A great example of the new cluster upgrade method can be found with some vendors that offer Elasticsearch as a service and blue/green deployment features.
AWS OpenSearch Service
In some cases, Graylog environments make use of Elasticsearch as a service. The most common example is the Amazon AWS OpenSearch service, formerly Elasticsearch service. Upgrading from one major version of Elasticsearch to another (or to OpenSearch) is done via the new cluster upgrade method, e.g. blue/green deployment. This method only requires a change to the configuration of the AWS OSS domain that defines the version of Elasticsearch or OpenSearch to use, and AWS manages the rest of the upgrade.
As a best practice, create a snapshot before you initiate the upgrade. More information on this upgrade process can be found in the AWS documentation.
Graylog Configuration Settings
The most important setting to make a successful connection is a list of comma-separated URIs to one or more OpenSearch nodes. Graylog needs to know the address of at least one other OpenSearch node given in the elasticsearch_hosts setting. The specified value should at least contain the scheme (http:// for unencrypted, https:// for encrypted connections), the hostname or IP and the port of the HTTP listener of this node (which is 9200 unless otherwise configured). Optionally, you can also specify an authentication section containing a user name and a password, if either of your OpenSearch nodes use Shield/X-Pack or Search Guard, or you have an intermediate HTTP proxy requiring authentication between the Graylog server and the OpenSearch node. Additionally you can specify an optional path prefix at the end of the URI.
A sample specification of elasticsearch_hosts:
elasticsearch_hosts = http://es-node-1.example.org:9200/foo,https://someuser:somepassword@es-node-2.example.org:19200Graylog does not currently react to externally triggered index changes (creating/closing/reopening/deleting an index). These actions need to be performed through the Graylog REST API in order to retain index consistency.
Available OpenSearch Configuration Tunables
The following configuration options are used to configure connectivity to OpenSearch:
| Config Setting | Type | Comments | Default |
|---|---|---|---|
elasticsearch_connect_timeout
|
Duration | Timeout when connection to individual OpenSearch hosts | 10s (10 Seconds) |
elasticsearch_hosts
|
List<URI> | Comma-separated list of URIs of OpenSearch hosts | http://127.0.0.1:9200
|
elasticsearch_idle_timeout
|
Duration | Timeout after which idle connections are terminated | -1s (Never) |
elasticsearch_max_total_connections
|
int | Maximum number of total OpenSearch connections | 20
|
elasticsearch_max_total_connections_per_route
|
int | Maximum number of OpenSearch connections per route/host | 2
|
elasticsearch_socket_timeout
|
Duration | Timeout when sending/receiving from OpenSearch connection | 60s (60 Seconds) |
elasticsearch_discovery_enabled
|
boolean | Enable automatic OpenSearch node discovery | false
|
elasticsearch_discovery_default_user
|
String | The default username used for authentication for all newly discovered nodes. | empty (no authentication used for discovered nodes) |
|
|
String |
The default password used for authentication for all newly discovered nodes. |
empty (no authenticationused for discovered nodes) |
|
|
String |
The default scheme used for all newly discovered nodes. |
|
|
|
String |
Filter by node attributes for the discovered nodes |
empty (use all nodes) |
|
|
Duration |
Frequency of the OpenSearch node discovery |
|
|
|
boolean |
Enable GZIP compression of Elasticseach request payloads |
|
|
|
String |
Major version of the OpenSearch version used. If not specified, the version will be auto-sensed with the configured nodes. Will disable auto-sensing if specified. |
Values: |
|
|
boolean |
Enable muting of deprecation warnings for deprecated configuration settings in OpenSearch. These warnings are attached as “Warnings” in HTTP-Response headers and might clutter up the logs. Works only with ES7. |
false |
|
|
int |
Maximum number of retries to connect to OpenSearch on boot for the version probe before finally giving up. Use 0 to try until a connection can be made. |
|
|
|
Duration |
Waiting time in between connection attempts for elasticsearch_version_probe_attempts |
|
Automatic Version Sensing
We support multiple major versions of OpenSearch (starting with Graylog 4.0) which are partially incompatible with each other (ES6 & ES7). Therefore, we need to know which OpenSearch version is running in the cluster. This is why we make a single request to the first reachable OpenSearch node and parse the version of the response it sends back. There are a few things which could go wrong at this point. You might want to run an unsupported version. If you feel comfortable doing so, you can set the elasticsearch_version configuration variable. It will disable auto-sensing and force Graylog to pretend that this OpenSearch major version is running in the cluster. It will load the corresponding support module.
Automatic Node Discovery
Graylog uses automatic node discovery to gather a list of all available OpenSearch nodes in the cluster at runtime and distributes requests among them to potentially increase their performance and availability. To enable this feature, you need to set the elasticsearch_discovery_enabled to true. Optionally, you can define a filter allowing to selectively include/exclude discovered nodes using the elasticsearch_discovery_filter setting, or by tuning the frequency of the node discovery using the elasticsearch_discovery_frequency configuration option. If your OpenSearch cluster uses authentication, you need to specify the elasticsearch_discovery_default_user and elasticsearch_discovery_default_password settings. The username/password specified in these settings will be used for all nodes discovered in the cluster. If your cluster uses HTTPS, you also need to set the elasticsearch_discovery_default_scheme setting. It specifies the scheme used for discovered nodes and must be consistent across all nodes in the cluster.
Configuration of OpenSearch Nodes
Control Access to OpenSearch Ports
If you are not using Shield/X-Pack or Search Guard to authenticate access to your OpenSearch nodes, make sure to restrict access to the OpenSearch ports (default: 9200/tcp and 9300/tcp). Otherwise the data is readable by anyone who has access to the machine over a network.
Open File Limits
Because OpenSearch has to keep a lot of files open simultaneously it requires a higher open file limit than most operating system defaults allow. Set it to at least 64000 open file descriptors.
Graylog will show a notification in the web interface when there is a node in the OpenSearch cluster which has an open file limit that is too low.
Heap Size
We strongly recommended that you raise the standard size of heap memory allocated to OpenSearch. For example, set the ES_HEAP_SIZE environment variable to 24g to allocate 24GB. We also recommend using around 50% of the available system memory for OpenSearch (when running on a dedicated host) to leave enough space for the system caches that OpenSearch uses to a great extent. But please take care that you don’t exceed 32 GB!
Tuning OpenSearch
Graylog sets specific configurations for every index it manages. This tuning is sufficient for a lot of use cases and setups.
Avoiding Split-Brain and Shard Shuffling
Split-Brain Events
OpenSearch sacrifices consistency in order to ensure availability and partition tolerance. The reasoning behind this is that short periods of misbehavior are less problematic than short periods of unavailability. In other words, when OpenSearch nodes within a cluster are unable to replicate changes to data, they will keep serving applications such as Graylog. When the nodes are able to replicate their data, they will attempt to converge the replicas and achieve eventual consistency .
OpenSearch tackles the previous by electing leader nodes, which are in charge of database operations such as creating new indices, moving shards around the cluster nodes and so forth. Leader nodes coordinate their actions actively with others, ensuring that the data can be converged by non-leaders. The cluster nodes that are not leader nodes are not allowed to make changes that would break the cluster.
The previous mechanism can in some circumstances fail, causing a split-brain event. When an OpenSearch cluster is split into two sections which work on the data independently, data consistency is lost. As a result nodes will respond differently to the same queries. This is considered a catastrophic event because the data originating from the two leaders can not be rejoined automatically and it takes quite a bit of manual work to remedy the situation.
Avoiding Split-Brain Events
OpenSearch nodes take a simple majority vote over who is leader. If the majority agrees on one, then most likely the disconnected minority will give in and everything will be just fine. This mechanism requires that at least 3 nodes work together, merely one or two nodes can not form a majority.
The minimum amount of leader nodes required to elect a leader must be configured manually in elasticsearch.yml:
# At least NODES/2+1 on clusters with NODES > 2, where NODES is the number of master nodes in the cluster
discovery.zen.minimum_master_nodes: 2
An example of what configuration values should typically be:
| Leader Nodes | minimum_master_nodes
|
Comments |
|---|---|---|
| 1 | 1 | |
| 2 | 1 | With 2 the other nodes going down, this would stop the cluster from working! |
| 3 | 2 | |
| 4 | 3 | |
| 5 | 3 | |
| 6 | 4 |
Some of the leader nodes may be dedicated leader nodes, meaning that they are only configured to handle lightweight operational (cluster management) responsibilities. They will not be able to handle or store any of the cluster’s data. The function of such nodes is similar to so called witness servers on other database products. Setting them up on dedicated witness sites will greatly reduce the risk of OpenSearch cluster instability.
A dedicated leader node has the following configuration in elasticsearch.yml:
node.data: false
node.master: true
Shard Shuffling
When the cluster status changes because of a node restart or availability issues, OpenSearch will start automatically rebalancing the data in the cluster. The cluster works on making sure that the amount of shards and replicas will conform to the cluster configuration. This is a problem if status changes are just temporary. Moving shards and replicas around in the cluster takes up a considerable amount of resources and should be done only when necessary.
Avoiding Unnecessary Shuffling
OpenSearch has a couple of configuration options which are designed to allow short times of unavailability before starting the recovery process with shard shuffling. There are 3 settings that may be configured in elasticsearch.yml:
-
gateway.recover_after_nodes: 8-
Recovers only after the given number of nodes have joined the cluster. Can be seen as "minimum number of nodes to attempt recovery at all."
-
-
gateway.recover_after_time: 5m-
Time to wait for additional nodes after
recover_after_nodesis met.
-
-
gateway.expected_nodes: 10-
Informs OpenSearch about how many nodes form a full cluster. If this number is met, start up immediately.
-
The configuration options should be set up so that only minimal node unavailability is tolerated. For example server restarts are common and should be managed. The logic is that if you lose large parts of your cluster, you should not tolerate the situation and you probably should start re-shuffling the shards and replicas.
Custom Index Mappings
Sometimes it’s better to define a stricter schema for messages.
Graylog itself uses a default mapping which includes settings for the timestamp, message, full_message, and source fields of indexed messages:
$ curl -X GET 'http://localhost:9200/_template/graylog-internal?pretty'
{
"graylog-internal" : {
  "order" : -1,
  "index_patterns" : [
    "graylog_*"
  ],
  "settings" : {
    "index" : {
      "analysis" : {
        "analyzer" : {
          "analyzer_keyword" : {
            "filter" : "lowercase",
            "tokenizer" : "keyword"
          }
        }
      }
    }
  },
  "mappings" : {
    "message" : {
      "_source" : {
        "enabled" : true
      },
      "dynamic_templates" : [
        {
          "internal_fields" : {
            "mapping" : {
              "type" : "keyword"
            },
            "match_mapping_type" : "string",
            "match" : "gl2_*"
          }
        },
        {
          "store_generic" : {
            "mapping" : {
              "type" : "keyword"
            },
            "match_mapping_type" : "string"
          }
        }
      ],
      "properties" : {
        "gl2_processing_timestamp" : {
          "format" : "yyyy-MM-dd HH:mm:ss.SSS",
          "type" : "date"
        },
        "gl2_accounted_message_size" : {
          "type" : "long"
        },
        "gl2_receive_timestamp" : {
          "format" : "yyyy-MM-dd HH:mm:ss.SSS",
          "type" : "date"
        },
        "full_message" : {
          "fielddata" : false,
          "analyzer" : "standard",
          "type" : "text"
        },
        "streams" : {
          "type" : "keyword"
        },
        "source" : {
          "fielddata" : true,
          "analyzer" : "analyzer_keyword",
          "type" : "text"
        },
        "message" : {
          "fielddata" : false,
          "analyzer" : "standard",
          "type" : "text"
        },
        "timestamp" : {
          "format" : "yyyy-MM-dd HH:mm:ss.SSS",
          "type" : "date"
        }
      }
    }
  },
  "aliases" : { }
}
In order to extend the default mapping of OpenSearch and Graylog, you can create one or more custom index mappings and add them as index templates to OpenSearch.
Let’s say we have a schema for our data like the following:
| Field Name | Field Type | Example |
|---|---|---|
http_method
|
keyword | GET |
http_response_code
|
long | 200 |
ingest_time
|
date | 2016-06-13T15:00:51.927Z |
took_ms
|
long | 56 |
This would translate to the following additional index mapping in OpenSearch:
"mappings" : {
  "message" : {
    "properties" : {
      "http_method" : {
        "type" : "keyword"
      },
      "http_response_code" : {
        "type" : "long"
      },
      "ingest_time" : {
        "type" : "date",
        "format": "strict_date_time"
      },
      "took_ms" : {
        "type" : "long"
      }
    }
  }
}
When Graylog creates a new index in OpenSearch, it has to be added to an index template in order to apply additional index mapping. The Graylog default template (graylog-internal) has the lowest priority, and OpenSearch will merge it with the custom index template.
Creating a New Index Template
Save the following index template for the custom index mapping into a file named graylog-custom-mapping.json:
{
  "template": "graylog_*",
  "mappings": {
    "properties": {
      "http_method": {
        "type": "keyword"
      },
      "http_response_code": {
        "type": "long"
      },
      "ingest_time": {
        "type": "date",
        "format": "strict_date_time"
      },
      "took_ms": {
        "type": "long"
      }
    }
  }
}
Finally, load the index mapping into OpenSearch with the following command:
$ curl -X PUT -d @'graylog-custom-mapping.json' -H 'Content-Type: application/json' 'http://localhost:9200/_template/graylog-custom-mapping?pretty'
{
  "acknowledged" : true
}
Every OpenSearch index created thereon, will have an index mapping consisting of the original graylog-internal index template and the new graylog-custom-mapping template:
$ curl -X GET 'http://localhost:9200/graylog_deflector/_mapping?pretty'
{
  "graylog_3" : {
    "mappings" : {
      "message" : {
        "dynamic_templates" : [
          {
            "internal_fields" : {
              "match" : "gl2_*",
              "match_mapping_type" : "string",
              "mapping" : {
                "type" : "keyword"
              }
            }
          },
          {
            "store_generic" : {
              "match_mapping_type" : "string",
              "mapping" : {
                "type" : "keyword"
              }
            }
          }
        ],

        "properties" : {
          "full_message" : {
            "type" : "text",
            "analyzer" : "standard"
          },
          "http_method" : {
            "type" : "keyword"
          },
          "http_response_code" : {
            "type" : "long"
          },
          "ingest_time" : {
            "type" : "date",
            "format" : "strict_date_time"
          },
          "message" : {
            "type" : "text",
            "analyzer" : "standard"
          },
          "source" : {
            "type" : "text",
            "analyzer" : "analyzer_keyword",
            "fielddata" : true
          },
          "streams" : {
            "type" : "keyword"
          },
          "timestamp" : {
            "type" : "date",
            "format" : "yyyy-MM-dd HH:mm:ss.SSS"
          },
          "took_ms" : {
            "type" : "long"
          }
        }
      }
    }
  }
}Deleting Custom Index Templates
If you want to remove an existing index template from OpenSearch, simply issue a DELETE request to OpenSearch:
$ curl -X DELETE 'http://localhost:9200/_template/graylog-custom-mapping?pretty'
{
  "acknowledged" : true
}
After you’ve removed the index template, new indices will only have the original index mapping:
$ curl -X GET 'http://localhost:9200/graylog_deflector/_mapping?pretty'
{
  "graylog_3" : {
    "mappings" : {
      "message" : {
        "dynamic_templates" : [
          {
            "internal_fields" : {
              "match" : "gl2_*",
              "match_mapping_type" : "string",
              "mapping" : {
                "type" : "keyword"
              }
            }
          },
          {
            "store_generic" : {
              "match_mapping_type" : "string",
              "mapping" : {
                "type" : "keyword"
              }
            }
          }
        ],

        "properties" : {
          "full_message" : {
            "type" : "text",
            "analyzer" : "standard"
          },
          "message" : {
            "type" : "text",
            "analyzer" : "standard"
          },
          "source" : {
            "type" : "text",
            "analyzer" : "analyzer_keyword",
            "fielddata" : true
          },
          "streams" : {
            "type" : "keyword"
          },
          "timestamp" : {
            "type" : "date",
            "format" : "yyyy-MM-dd HH:mm:ss.SSS"
          }
        }
      }
    }
  }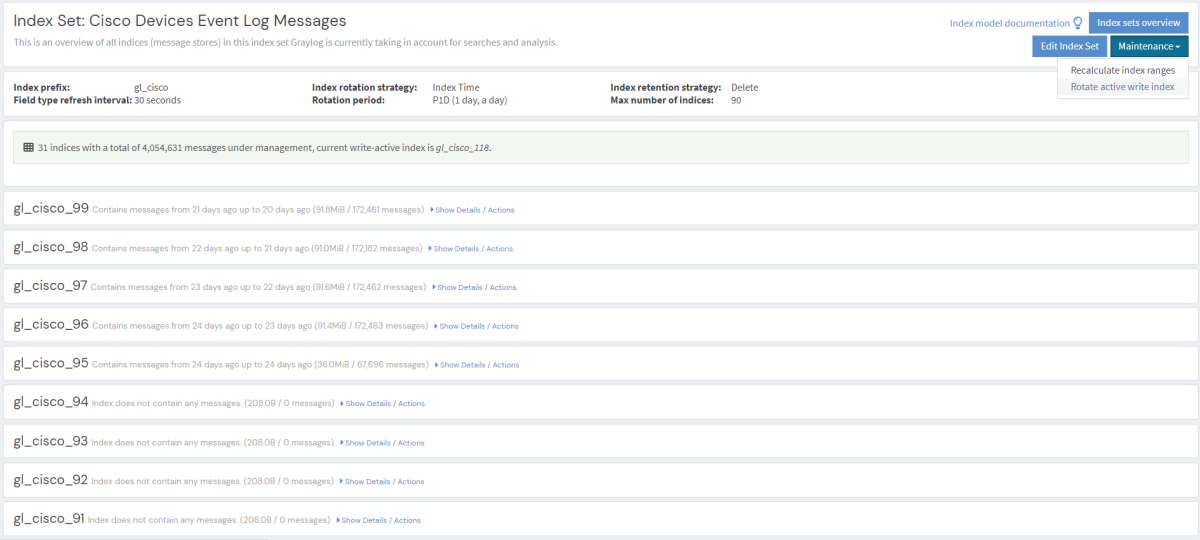
}Rotate Indices Manually
Select the desired index set on the System > Indices page in the Graylog web interface by clicking on the name of the index set, then select “Rotate active write index” from the “Maintenance” drop-down menu.
Cluster Status Explained
The cluster status applies to different levels:
-
Shard level - see status descriptions below
-
Index level - inherits the status of the worst shard status
-
Cluster level - inherits the status of the worst index status
That means that the OpenSearch cluster status will turn red if a single index or shard has problems even though the rest of the indices/shards are okay.
Explanation of different status levels:
Red
The RED status indicates that some or all of the primary shards are not available.
In this state, no searches can be performed until all primary shards have been restored.
Yellow
The YELLOW status means that all of the primary shards are available but some or all shard replicas are not.
When the index configuration includes replications with a count that is equal or higher than the number of nodes, your cluster cannot become green. In most cases, this can be solved by adding another OpenSearch node to the cluster or by reducing the replication factor of the indices.
Green
The cluster is fully operational. All primary and replica shards are available.
