Restore an Archive
After you set up Graylog archiving and have archived your first set of data, you can restore your archives when required, such as when you need to search and analyze the data.
Restore Archived Data
You may restore archived indices via the:
Note that Graylog restores all indices in the Restored Archives index set to avoid conflicts with the original indices (if they still exist).
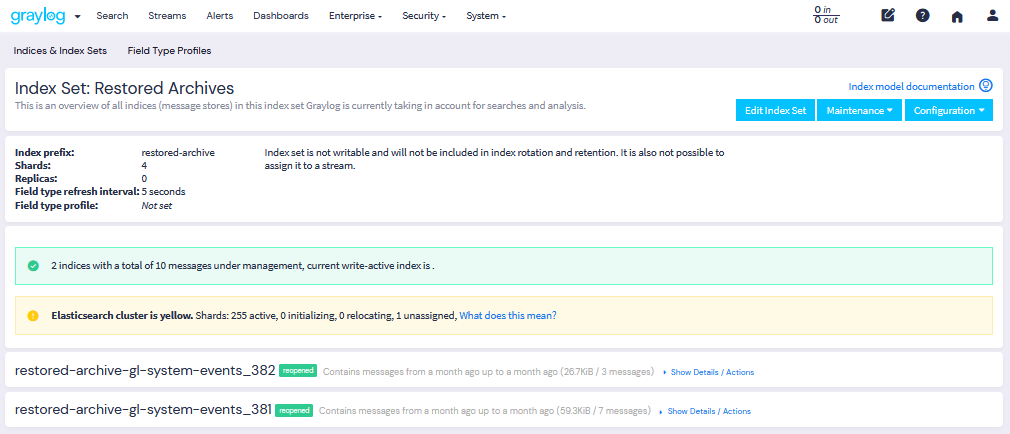
Restored indices are also marked as reopened, so they are ignored by index-retention jobs and are not closed or deleted. Therefore, you must manually delete restored indices when you no longer need them.
Restore Indices via the Graylog Interface
To restore an archive in the interface:
Navigate to Enterprise > Archives.
Select an index set from the Archive Catalog section.
Click the Restore Index button.
You may also restore or delete multiple index sets via the Bulk Actions drop down found next to the search box.
Restore Indices via the REST API
As with archive creation, you can also use the REST API to restore an archived index into the OpenSearch cluster:
$ curl -s -u admin -H 'X-Requested-By: cli' -X POST http://127.0.0.1:9000/api/plugins/org.graylog.plugins.archive/archives/graylog_386/restore
Enter host password for user 'admin': ***************
{
   "archive_metadata": {
     "archive_id": "graylog_307",
     "index_name": "graylog_307",
     "document_count": 491906,
     "created_at": "2016-04-14T14:31:50.787Z",
     "creation_duration": 142663,
     "timestamp_min": "2016-04-14T14:00:01.008Z",
     "timestamp_max": "2016-04-14T14:29:27.639Z",
     "id_mappings": {
       "streams": {
         "56fbafe0fb121a5309cef297": "nginx requests"
       },
       "inputs": {
         "56fbafe0fb121a5309cef290": "nginx error_log",
         "56fbafe0fb121a5309cef28d": "nginx access_log"
       },
       "nodes": {
         "c5df7bff-cafd-4546-ac0a-5ccd2ba4c847": "graylog.example.org"
       }
     },
     "histogram_bucket_size": 86400000,
     "source_histogram": {
       "2016-04-14T00:00:00.000Z": {
         "example.org": 227567
       }
     },
     "segments": [
       {
         "path": "archive-segment-0.gz",
         "size": 21653755,
         "raw_size": 2359745839,
         "compression_type": "SNAPPY"
         "checksum": "751e6e76",
         "checksum_type": "CRC32"
       }
     ],
     "index_size": 12509063,
     "index_shard_count": 4
   },
   "system_job": {
     "id": "e680dcc0-07a2-11e6-9e1b-fa163e6e9b8a",
     "description": "Restores an index from the archive",
     "name": "org.graylog.plugins.archive.job.ArchiveRestoreSystemJob",
     "info": "Restoring documents from archived index: graylog_307",
     "node_id": "c5df7bff-cafd-4546-ac0a-5ccd2ba4c847",
     "started_at": "2016-04-21T09:24:51.468Z",
     "percent_complete": 0,
     "provides_progress": true,
     "is_cancelable": true
   }
 }
The returned JSON payload contains the archive metadata and the system job description that runs the index-restore process.
Restore into a Separate Cluster
The added load from restored indices slows down your indexing speed. To avoid adding more load to your primary OpenSearch cluster, you can also restore the archived indices on a different cluster:
Transfer the archived indices to a different machine.
Place them in a configured backend.
Each index archive is in a separate directory, so if you only want to transfer one index to a different machine, copy the corresponding directory into the backend. For example:
$ tree /tmp/graylog-archive
  /tmp/graylog-archive
  ├── graylog_171
  │   ├── archive-metadata.json
  │   └── archive-segment-0.gz
  ├── graylog_201
  │   ├── archive-metadata.json
  │   └── archive-segment-0.gz
  ├── graylog_268
  │   ├── archive-metadata.json
  │   └── archive-segment-0.gz
  ├── graylog_293
  │   ├── archive-metadata.json
  │   └── archive-segment-0.gz
  ├── graylog_307
  │   ├── archive-metadata.json
  │   └── archive-segment-0.gz
  ├── graylog_386
  │   ├── archive-metadata.json
  │   └── archive-segment-0.gz
  └── graylog_81
      ├── archive-metadata.json
      └── archive-segment-0.gz
  7 directories, 14 files
Configure the Restored Archives Index Set
The Restored Archives index set is created automatically and used both for restored archive data and for Data Lake data retrievals. Using the Restored Archives index set avoids conflicts with the original indices (if they still exist).
The Restored Archives index set allows you to set the number of shards, like other index sets. However, we recommended using the Automated Shard Management setting to allow Graylog to dynamically calculate the optimal number of shards during retrieval. Graylog calculates the shard value based on the size of the retrieval job (amount of data) and other factors to optimize the retrieval performance.
To set or change Restored Archives settings:
Navigate to System > Indices, then select the Restored Archives Index Set tab.
Select Edit Index Set.
Add or update any configuration values necessary:
Index Shards
Sets the number of shards created per index when data is retrieved into this index set. Increasing the shard count improves write speed. This value should not be set higher than the number of search nodes.
Hint: When Automated Shard Management is enabled, this value is managed dynamically, and the set value is used only as a fallback when the size of the restore or retrieval job is unknown.Index Replica
Sets the number of search cluster replica shards used per index in this index set. Adding replica shards improves search performance during parallel reads of the index, such as occurs on dashboards. Each replica shard multiplies the storage requirement and memory footprint of the index. This value should not be set higher than the number of search nodes, and typically not higher than 1.
Automated Shard Management
Select to dynamically scale the count of shards for indexes created by archive restore or Data Lake retrieval jobs. Enabled by default.
Size of restore/retrieval per additional shard
Use this value to adjust dynamic sizing. When Automated Shard Management is enabled, the maximum number of shards in an index created for a retrieval job is calculated as
Size of the retrieval / Value of this fieldWe recommend setting this value no larger than 0.6x the RAM provision for an OpenSearch or Data Node server in your cluster. Smaller values result in parallelism being triggered by smaller jobs.
Select Update Configuration.
Note that the Restored Archives Index Set tab also lists any previously retrieved data.
Search in Restored Indices
Search queries automatically use restored indices. Every restored message in an index has a special gl2_archive_restored field with the value true, so you can search in restored messages using a query like:
_exists_:gl2_archive_restored AND <your search query>
If you want to exclude all restored messages from your query, use:
NOT _exists_:gl2_archive_restored AND <your search query>
