Content Packs
Content packs are a convenient way to share configuration as a content pack in a JSON file that contains a set of configurations for Graylog components. This JSON file can be uploaded to various Graylog instances as desired. Graylog has prebuilt some content packs for use with Illuminate while many user-created content packs can be found in Graylog Marketplace. For example, anyone who takes the time to create an input, pipelines, and a dashboard for a specific log format can easily share their efforts with the community! This article reviews how to create and manage custom content packs via the Graylog interface.
Create a New Content Pack
- Navigate to System > Content Packs.
- Select Create a Content Pack on the upper right side of the page to begin the new content pack wizard. Note there are three steps to the content pack creation wizard: Content Selection, Parameters, and Preview.
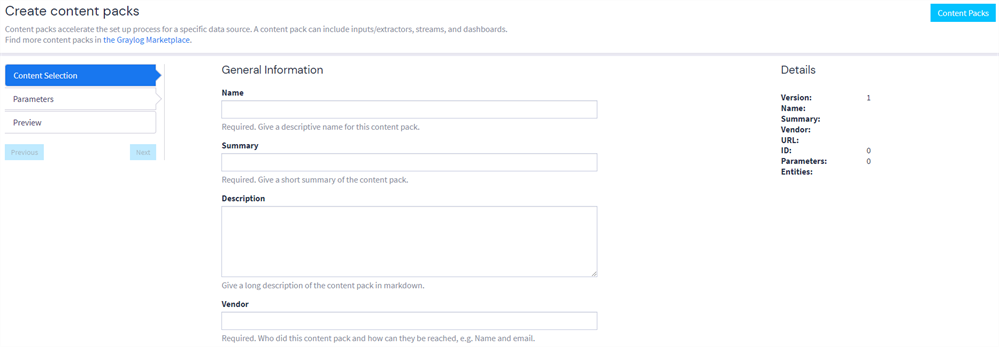
- Complete the General Information section as indicated, including Name, Summary, Description, Vendor, and URL.
-
- Select Next or Parameter to proceed to the Parameter page. (For more information on parameters, proceed to the following section.) To create a parameter, click Create parameter. Specify the name, type, and default value of the parameter in the menu that appears.
- Assign the parameter to a configuration key by selecting Edit on one of the previously selected configurations under Entity List.
- Select Next or Preview. The Preview page displays a summary of the new content pack for review.
- Click Create or Create and Download to finish the creation.
Attach a Stream
When creating a content pack, you may need to include dependent entities, such as streams. If a dashboard or other entity relies on a specific stream, that stream must be added to the content pack to ensure the configuration works correctly after installation.
Let’s look at an example.
A user has included a dashboard titled "GeoIP Resolver" in their content pack. This dashboard relies on a stream called "Random User Data Stream." Because this stream is a dependency, it must be explicitly added to the content pack along with the dashboard.
When you navigate to the Preview menu during content pack creation, the Entity list shows all components included in the pack. In the image below, both the dashboard and the stream are listed. The stream appears with the type stream, indicating that its full configuration is included and will be installed along with the content pack.
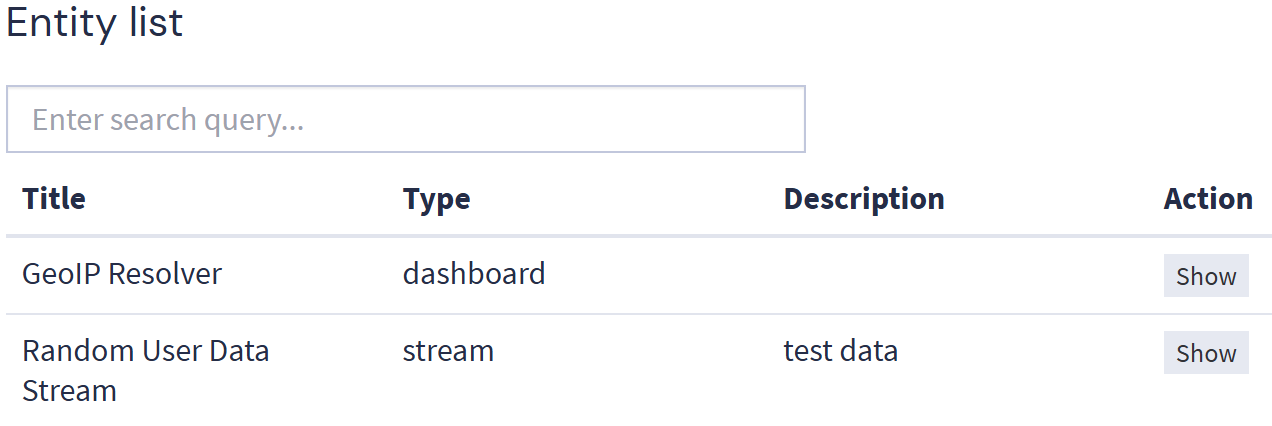
Including the stream ensures that the dashboard and any other dependent components function as expected when the content pack is deployed to another Graylog environment.
Use the preview to confirm that all required streams are properly included before finalizing your content pack.
Apply Parameters
Parameters are placeholders that indicate some value must be set by the user during the installation of the content pack. These parameters help to adjust the configuration to the needs of the individual. Graylog supports four types of configuration values: string, integer, double, and Boolean.
One example in which parameters can support content packs is in defining the port of an input. The creator of the content pack may have their input running on port 55055, but the user of the content pack may already have an input running on that specific port. The creator can specify a parameter and assign it to the port. The user of the content pack is asked for a value of the parameter on installation. The provided value is then used as the port of the input in the new system.
Upload a Content Pack
Many user-created content packs may be downloaded from Graylog Marketplace. To upload one of these content packs to your Graylog instance:
-
Download the desired content pack from the Marketplace as a JSON file.
-
Navigate to System > Content Packs and select Upload.
-
Click Choose File, then navigate to and select the downloaded content pack.
-
Click Upload to finish the process. The uploaded content pack may now be installed on the new Graylog system.
Install a Content Pack
To install the newest version of an available content pack (which may have been shared with you or prebuilt by Graylog) for use with your Graylog instance:
-
Navigate to System > Content Packs. This page shows the list of all current content packs.
-
Select Install on the desired content pack. A menu appears that asks for an Install Comment and the values of the indicated parameters. It also shows the list of configurations that will be installed on the system.
-
Click Install to complete the installation.
Uninstall a Content Pack
-
Navigate to System > Content Packs and select the name of the content pack that should be uninstalled. The menu that appears shows the details of an uploaded or created content pack.
-
On the left, select the version of the content pack. Below that is a list of previous installations of that content pack.
-
Click Uninstall next to the desired installation. A list of entities about to be removed is displayed.
